
Skip to content

Advanced lighting

One scene can use several light setups. Name the lights in Blender first, then check them in CMS. Each mode starts with a default on/off — override by camera or material when you need a different look.
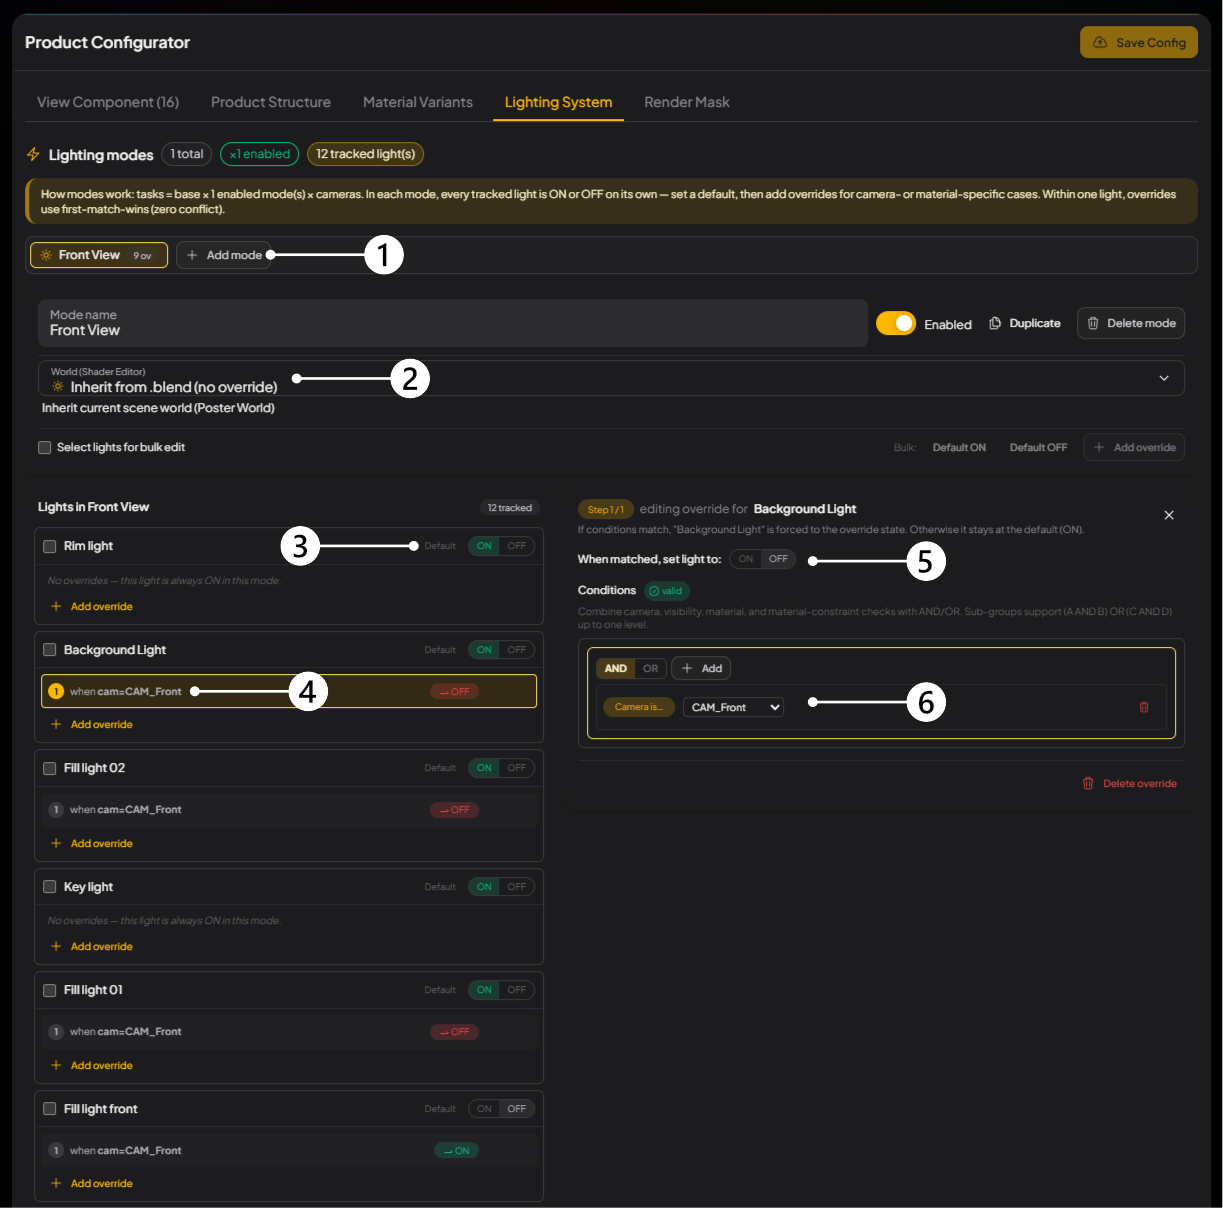
Product Configurator Lighting System tab: Add mode, World, default light switches, override summary, override target state, and the condition editor labeled
Front View mode: Background Light defaults ON, then turns OFF on CAM_Front.
Blocks ①–⑥ on the screenshot
Block What it does
① Add mode Create one light setup.
  • Click Add mode.
  • Fill Mode name — Front View, for example.
  • Use Enabled to include or skip this mode in Rendering Tasks.
② World Scene World for this mode.
  • Matches World in the Shader Editor.
  • Default is Inherit from .blend (no override). The screenshot uses Poster World.
  • Override and pick a shader only when you need a different environment.
③ Default That light’s starting state in this mode.
  • The Default switch on the left of the row: ON or OFF.
  • Background Light defaults ON in the figure.
④ Override Override summary on the light row.
  • Shows what this override finally does to the light.
  • Same setting as ⑤ and ⑥ on the right.
⑤ When matched, set light to After the conditions match, the light goes ON or OFF.
  • On the right, set When matched, set light to:
  • The figure sets OFF: when the camera is CAM_Front, this light turns off.
⑥ Conditions When this override applies.
  • Combine conditions with AND / OR.
  • The figure uses Camera is… CAM_Front. You can also add material, visibility, or material-constraint checks.
  • When you finish, click Save Config, then Load Rendering Tasks again so the queue picks up the new lights.