
Viewer configuration
Open Viewer Configuration for the public Viewer. You can set names and thumbnails while the batch runs. Anchors wait until it finishes — there is no image to click until then.
-
1Open Viewer Configuration
On the CMS project page, open Viewer Configuration. The tabs are View Component, Materials, Combination options, and Cameras & anchors. When you finish a tab, click Save Config in the top right.
-
2Set display names and thumbnails
Open View Component or Combination options. Name the items the customer will click, then upload thumbnails. You can do this while Rendering Tasks run.
When to set each tab Tab What you set When View Component Name and thumbnail for each View Component While rendering. Combination options Name and thumbnail for each style While rendering. Materials Name and thumbnail for each material Thumbnails generate automatically. After rendering and anchors are done, decide whether to replace them. 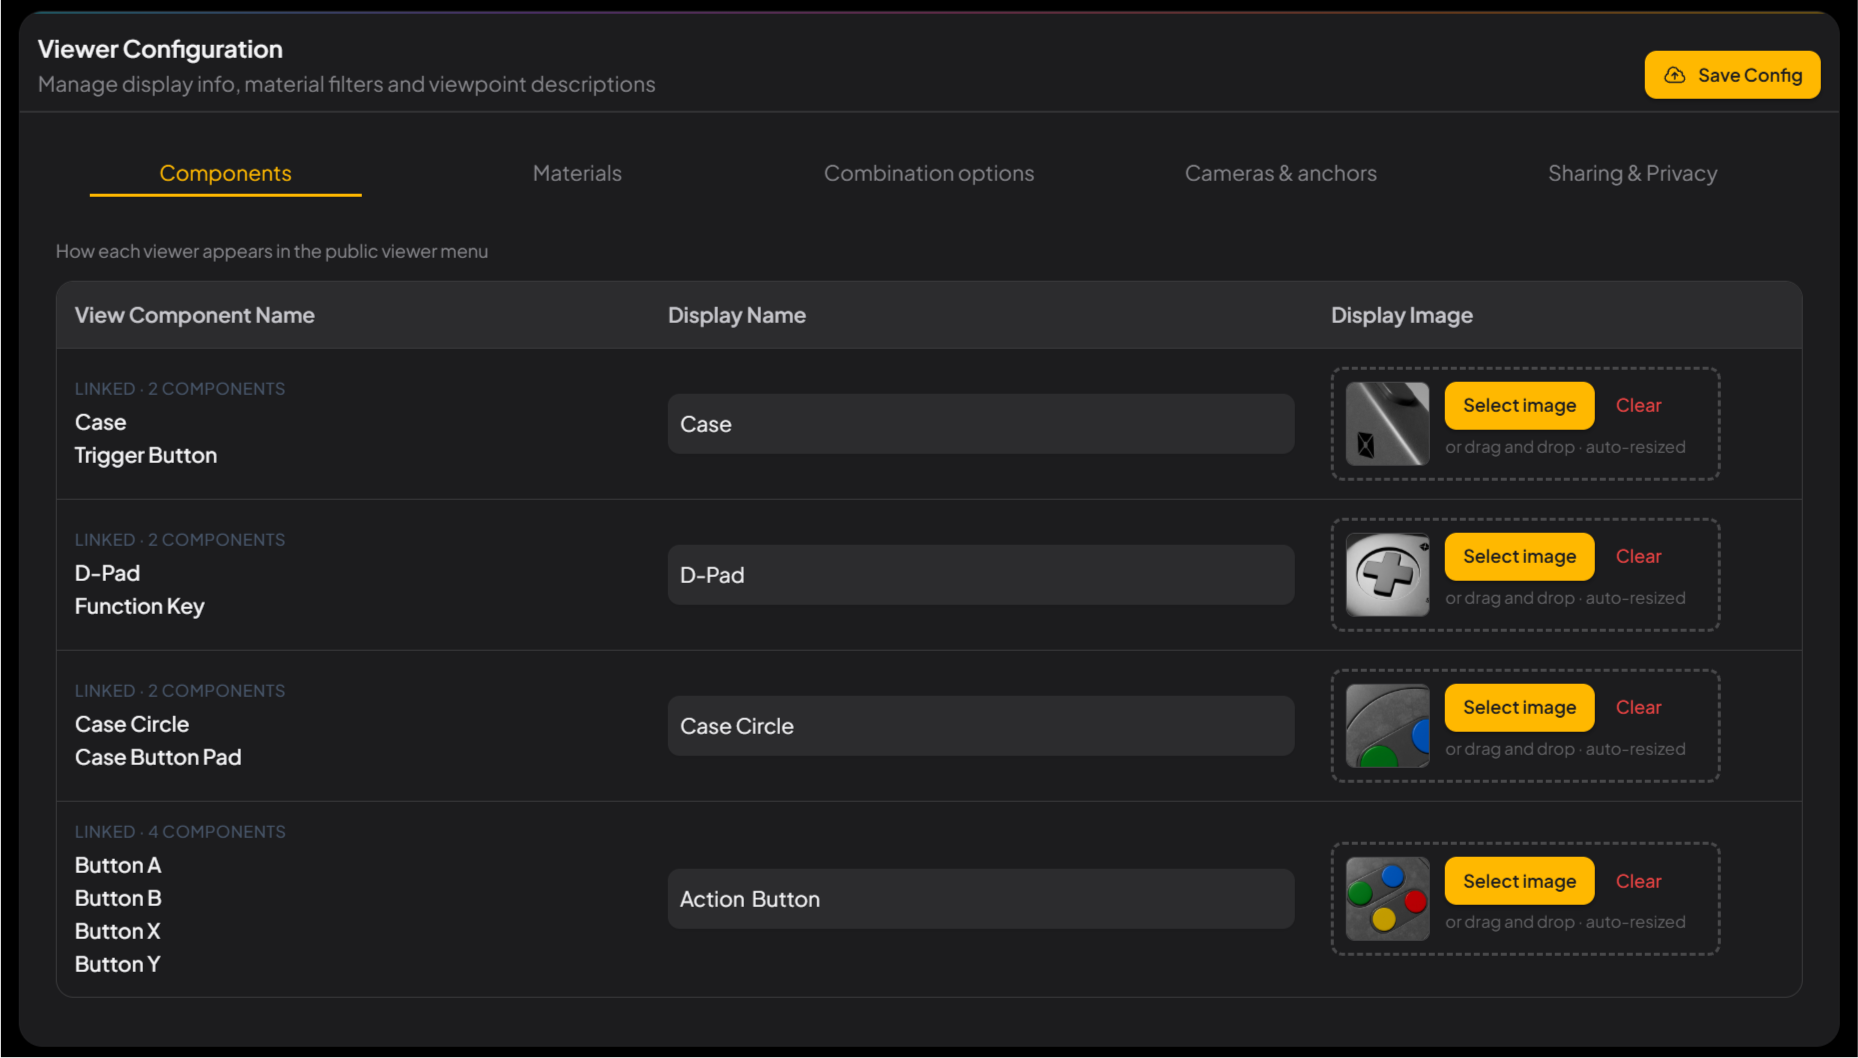
-
3Set anchors (after rendering finishes)
When Rendering Tasks finish, open Cameras & anchors. Pick a camera. Select the View Component it should target, then click the image to drop an anchor. When a visitor picks that View Component, the camera aims at the anchor. Put the pin where the part is easy to read. Keep neighboring pins apart so clicks do not miss.
Control What it does Select camera Switch the camera you are editing. Only rendered cameras appear. Display Name The name this camera uses in Viewer. Select image / Clear Upload or clear this camera’s thumbnail, or keep the one CMS generated. View Component Which View Component the anchor targets. Hollow circle = group. Solid circle = one View Component. Click / Drag Click the image to add an anchor. Drag to move it. 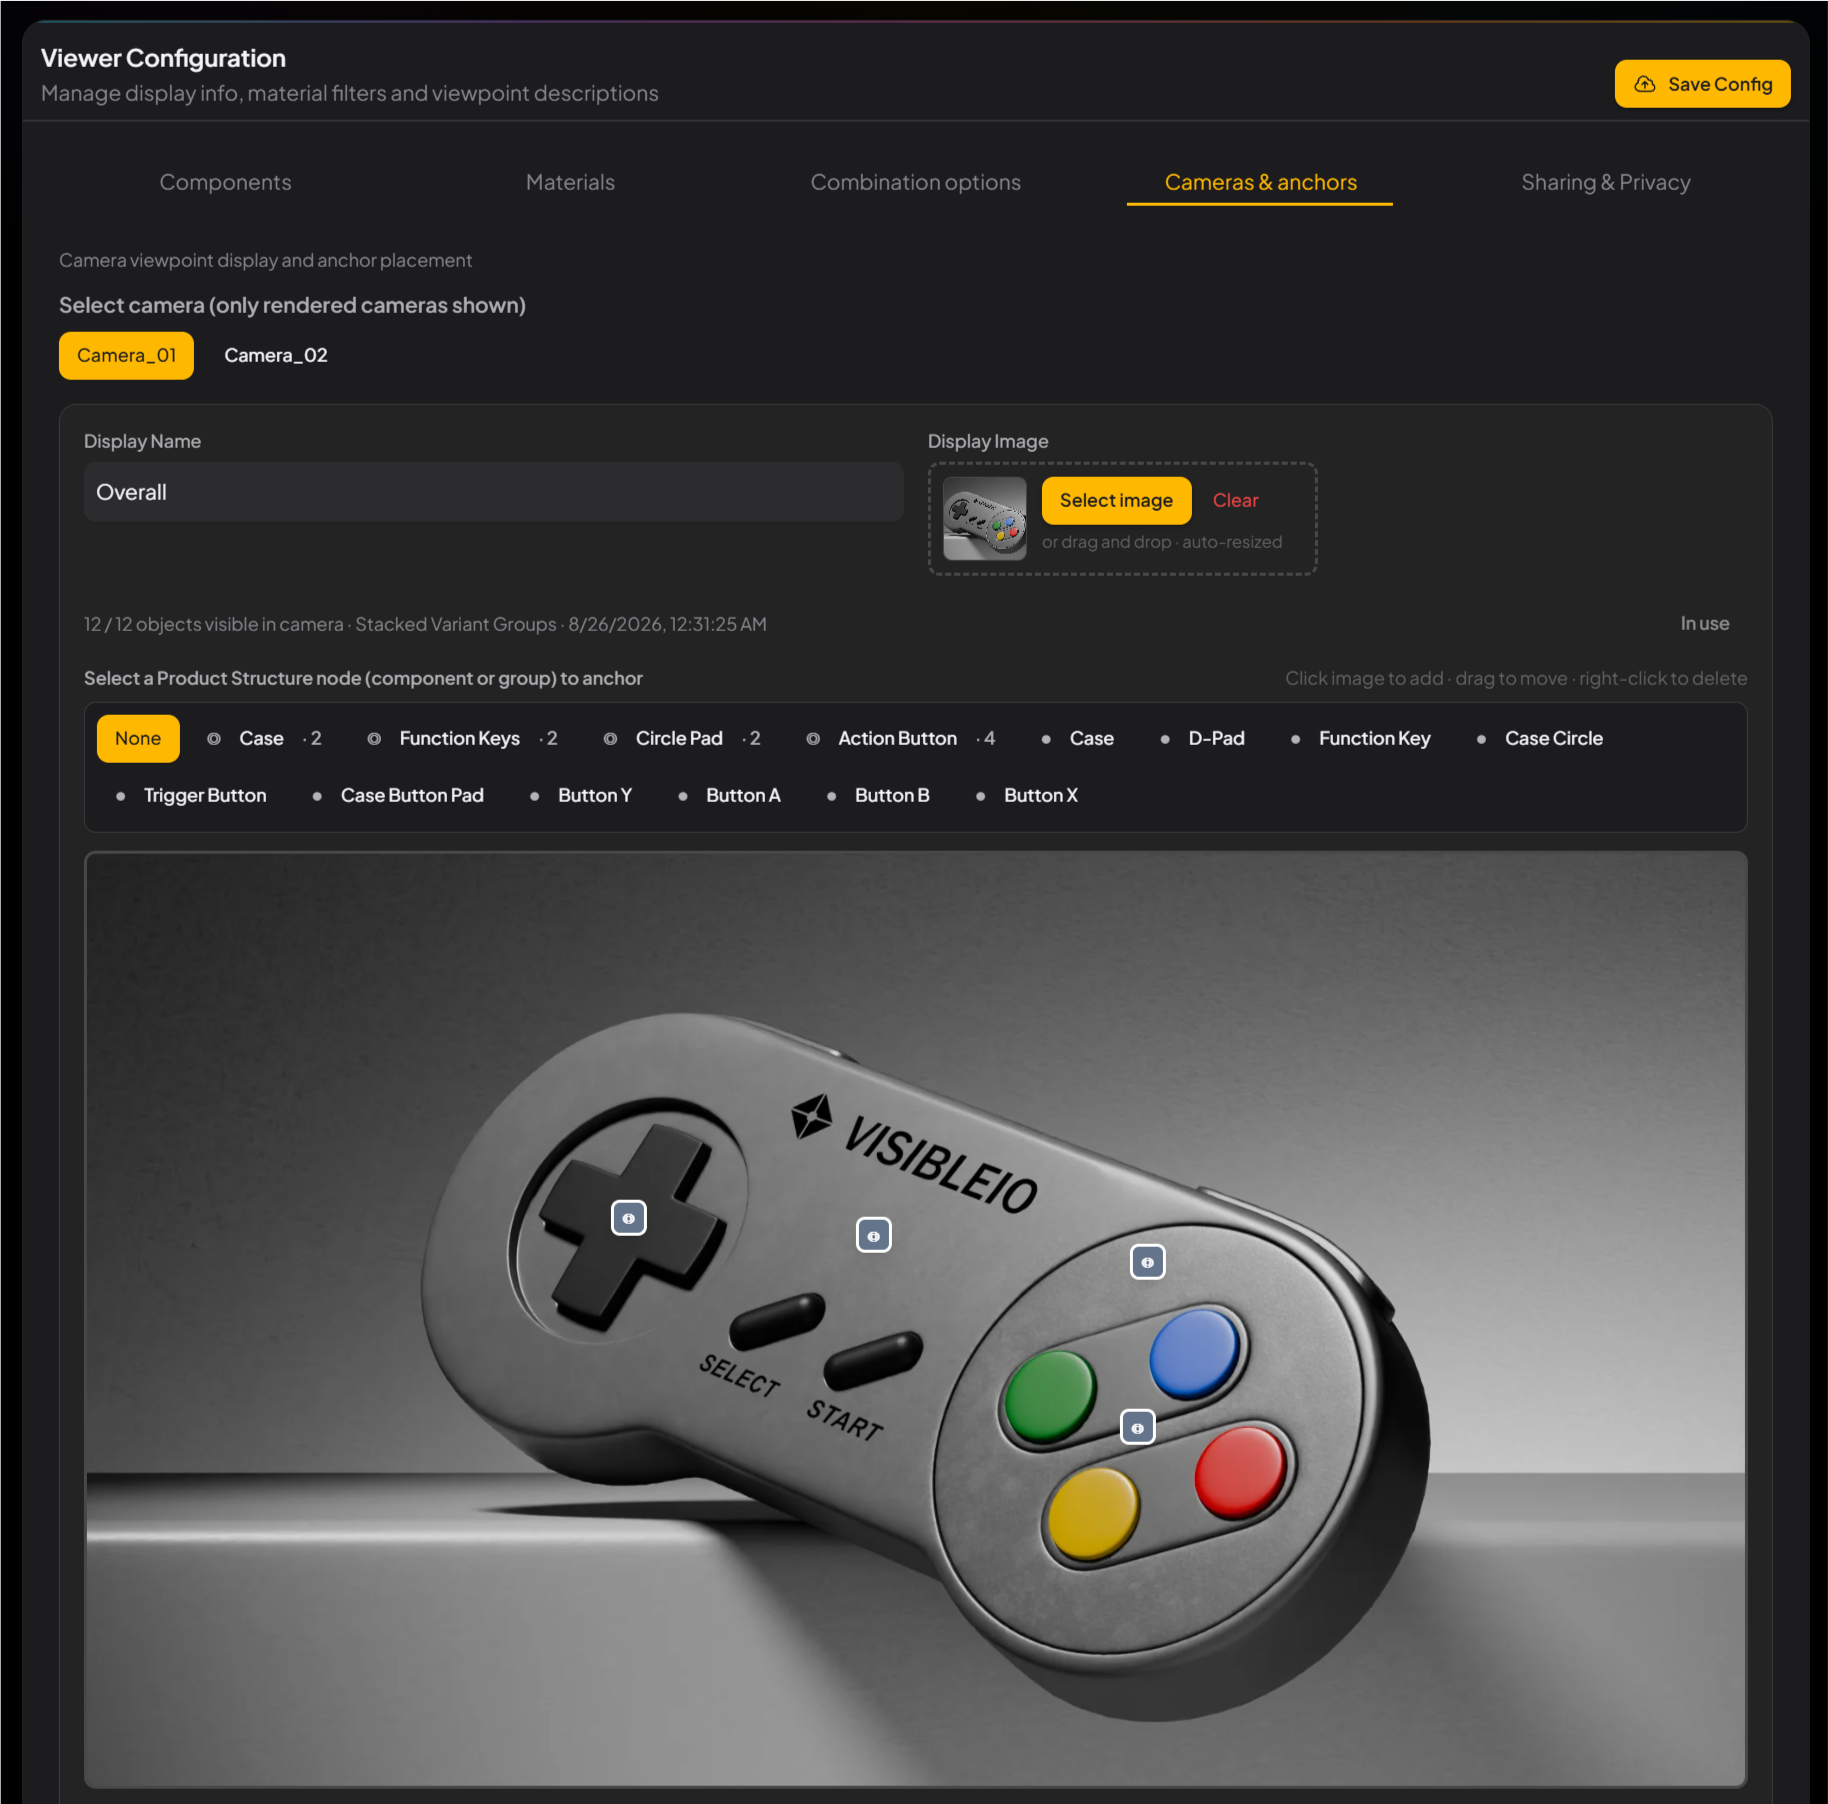
Pick a camera with Select camera and a View Component, then click the image to add an anchor. -
4Save Config and preview Viewer
Click Save Config, then open Viewer from the project page. Names, thumbnails, and anchors appear only after you save. Below is the public Viewer — the page your client opens.
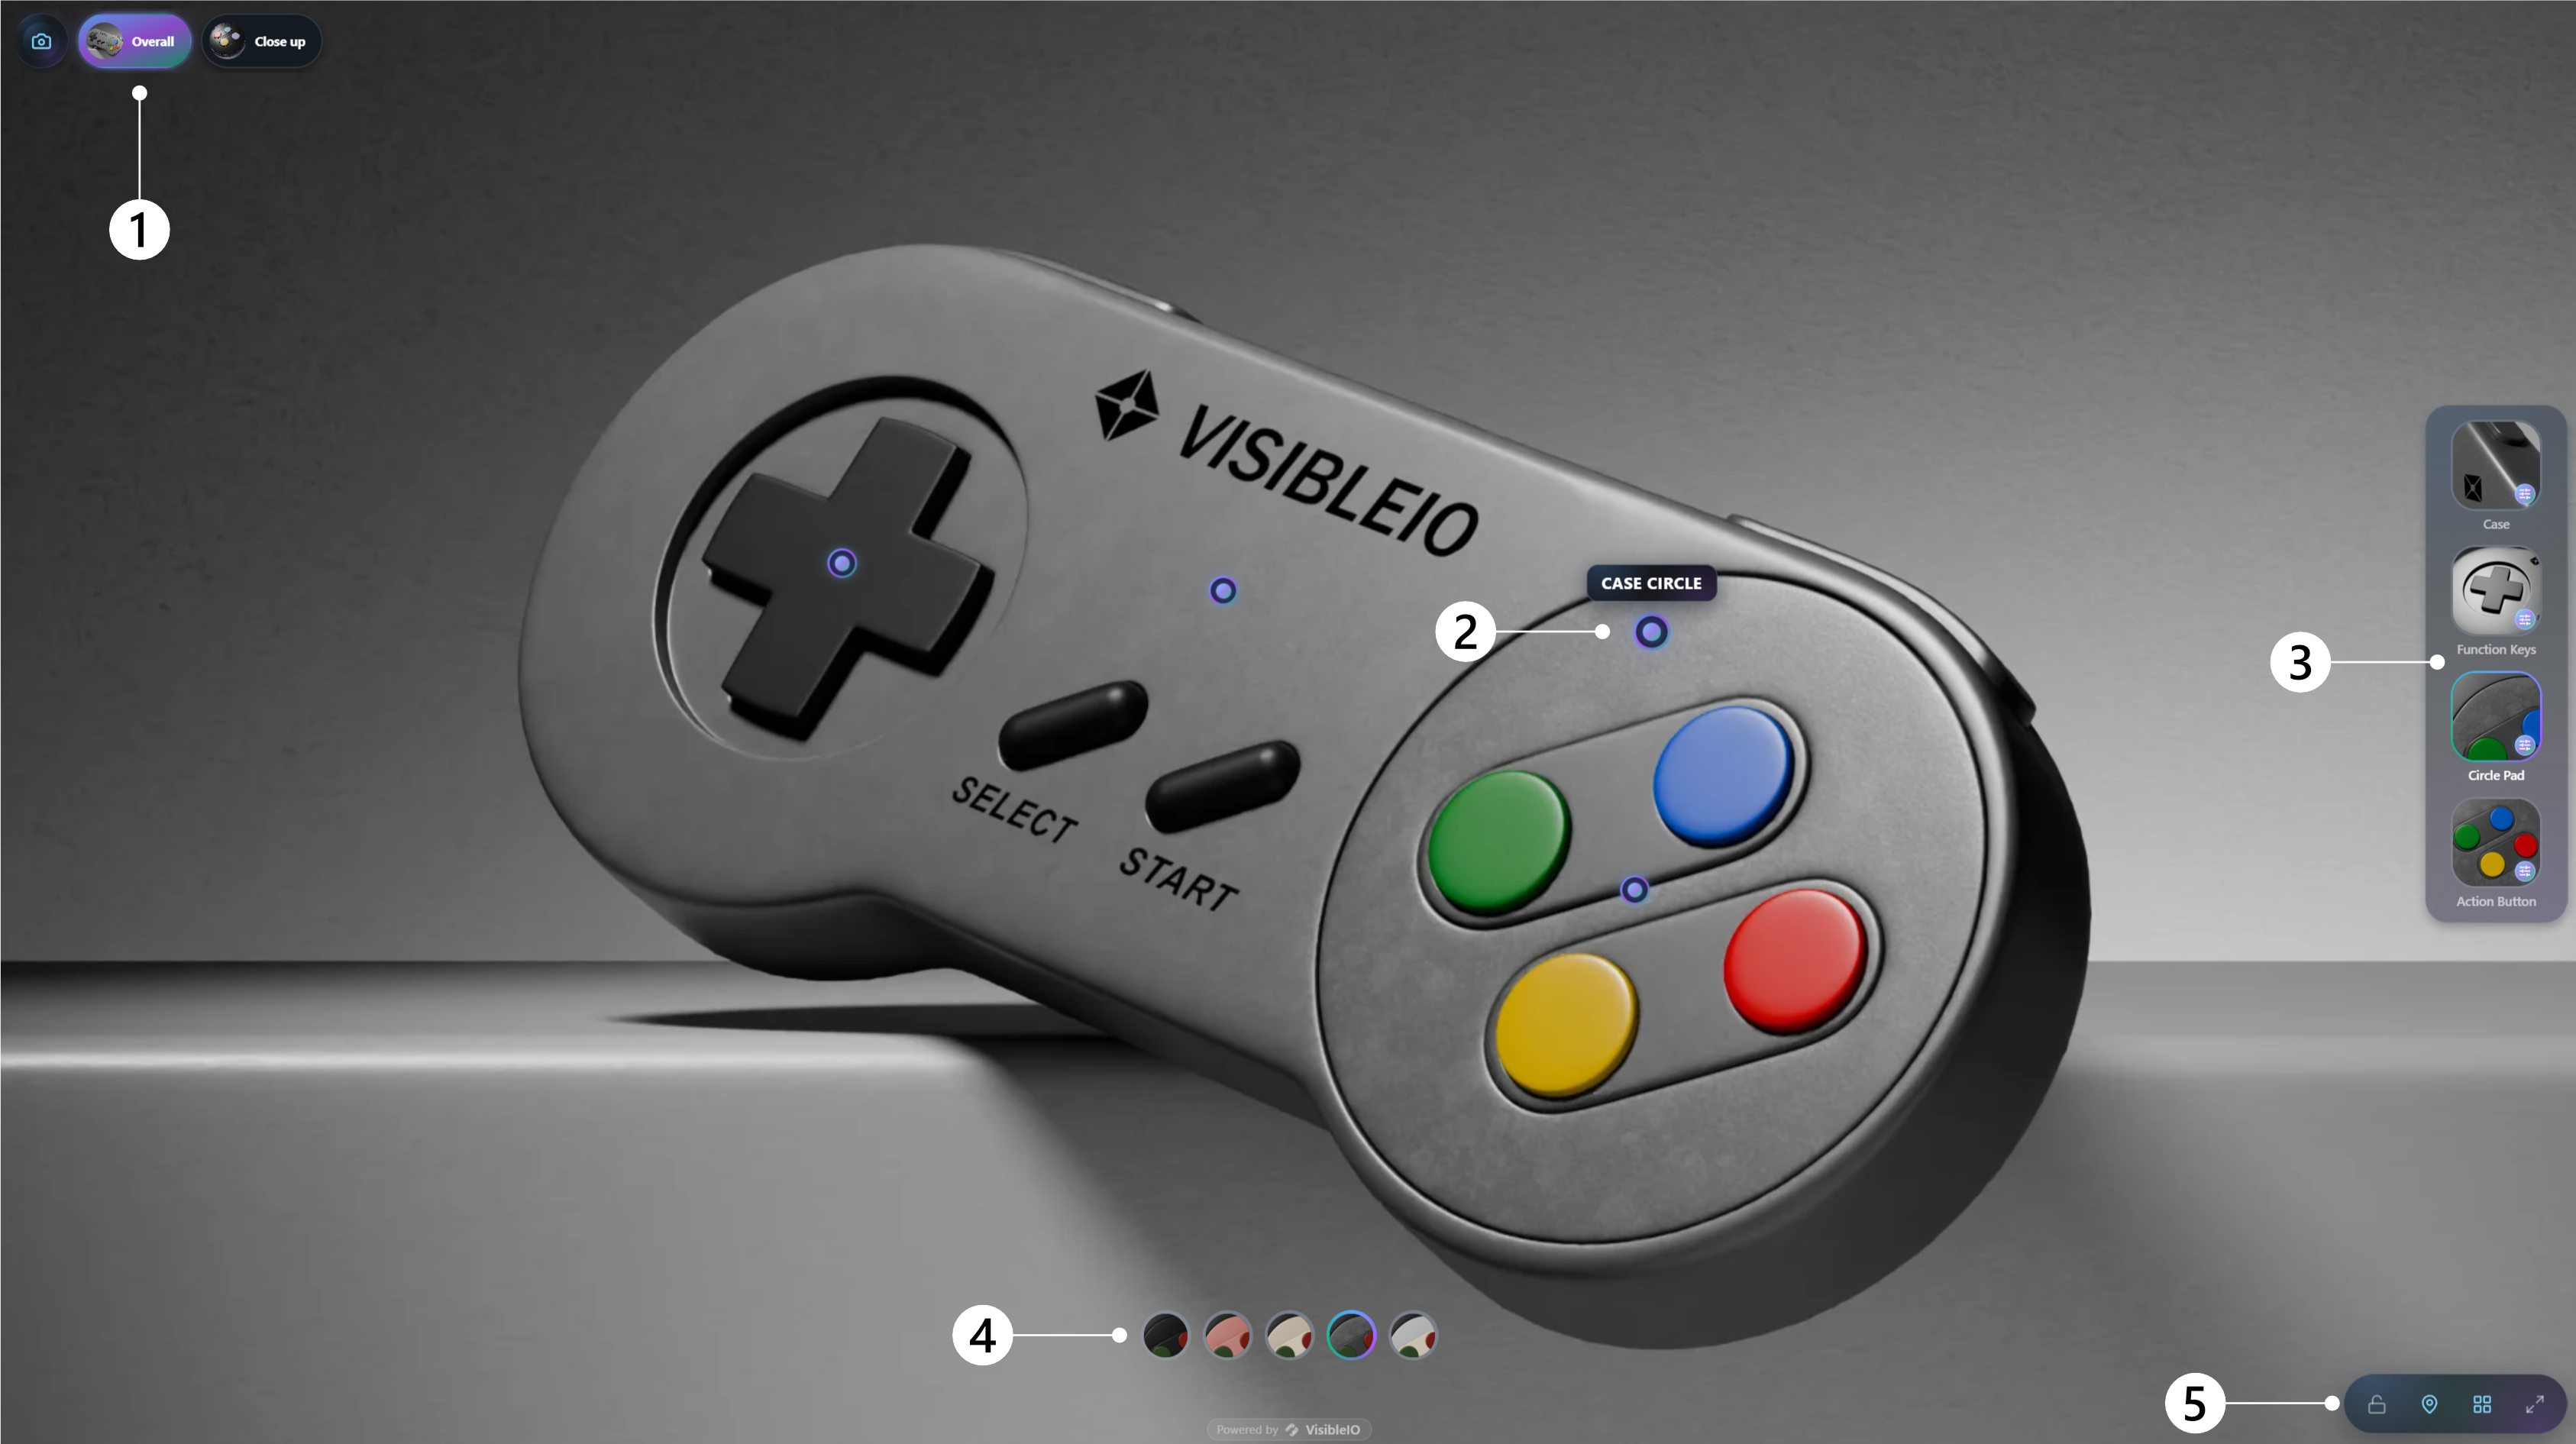
Viewer after Save Config. Match 1–5 to the table. # Area What it does 1 Cameras Switch the camera. Overall and Close up are the two cameras from this tutorial. 2 Anchors Pins you placed in Cameras & anchors. Click a pin to open materials for that View Component or Combination group. 3 View Components The parts the customer can pick. Names and thumbnails come from Viewer Configuration. 4 Materials A single View Component shows Materials — those thumbnails generate from Blender. A Combination group shows the looks you set in Combination options. 5 Viewer tools Lock the UI so it stays on screen, show or hide anchors, show or hide the menu, and turn fullscreen on or off.