Before you render
Confirm cameras in CMS and render settings in Blender before you click Load Rendering Tasks.
-
1Cameras and Lighting (CMS)
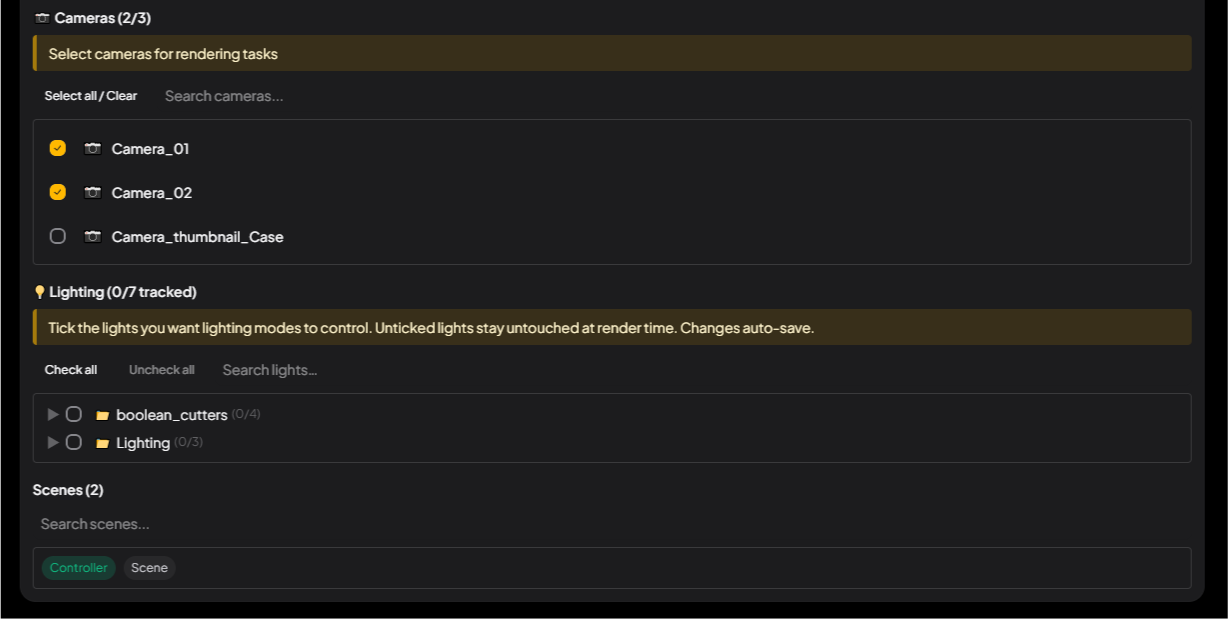
In the Cameras panel, check the angles you want in the batch. Unchecked cameras never enter Rendering Tasks, so the count drops.
-
2Check Render Mask
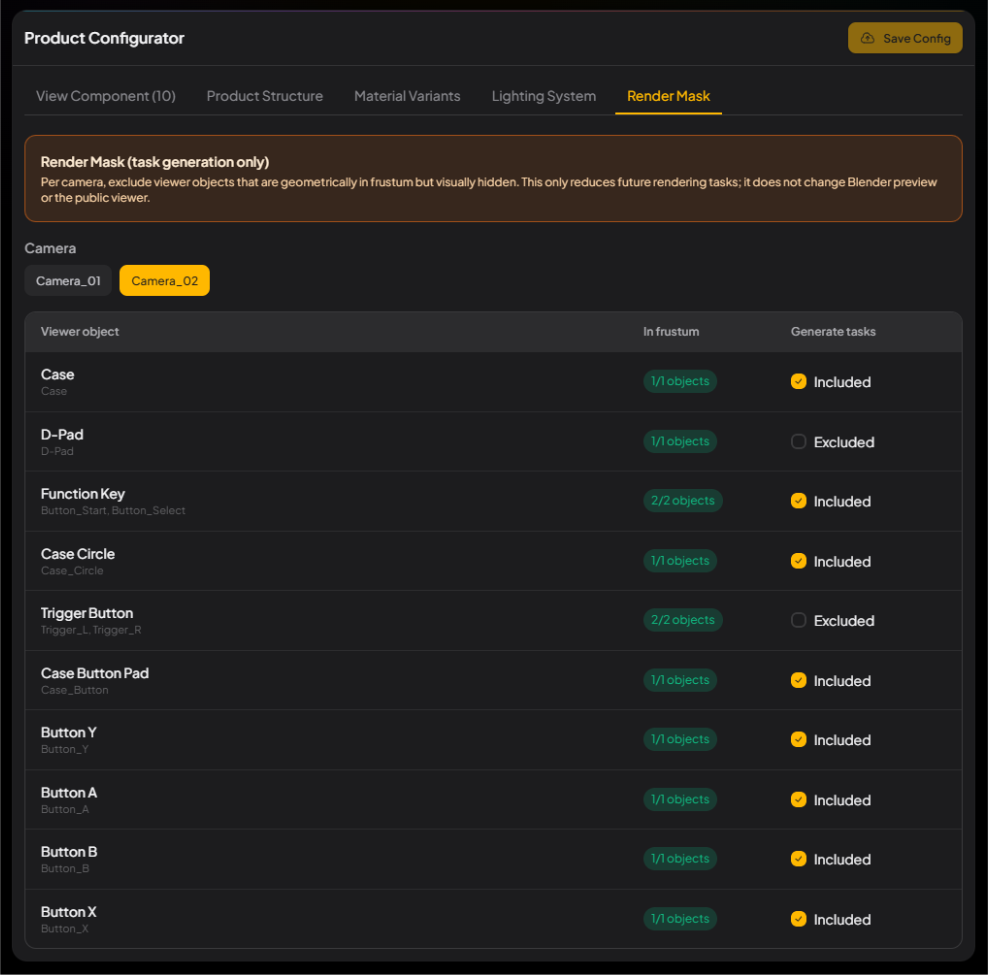
Open Render Mask to see, camera by camera, which View Components CMS thinks are in shot. For the gamepad in this tutorial, that automatic list is enough.
Confirm render settings in Blender
Quality, resolution, and file type still come from Blender. The camera icon is Render; the printer icon is Output.
-
3Confirm the Render engine and quality
In Properties on the right, click the camera icon to open Render, then check these:
Setting What to do Render Engine Cycles in this tutorial. Device GPU Compute if your machine has a GPU. Sampling Confirm the Render samples. These drive batch time and output quality. Denoise Leave it on for the batch. Before a large batch Render one still first so you can confirm Samples, such as before 1,080 images. 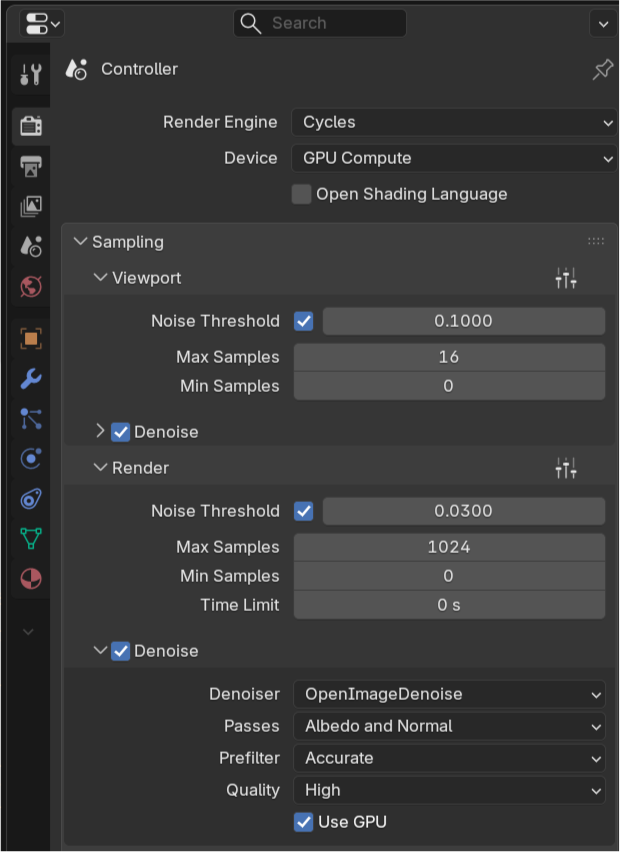
Render Properties — camera icon. -
4Confirm resolution and Output format
In the same Properties editor, click the printer icon to open Output, then check these:
Setting What to do Resolution Set this for the product and the target display. Most screens are about 1920×1080. File Format Leave the default (PNG). Output Path Leave this blank. Set the real path in the VisibleIO Sidebar — that is where the Add-on writes files. Media Type Set this to Image. Video breaks the batch. Everything else Leave Color (RGB), Color Depth (8), and the rest at their defaults. 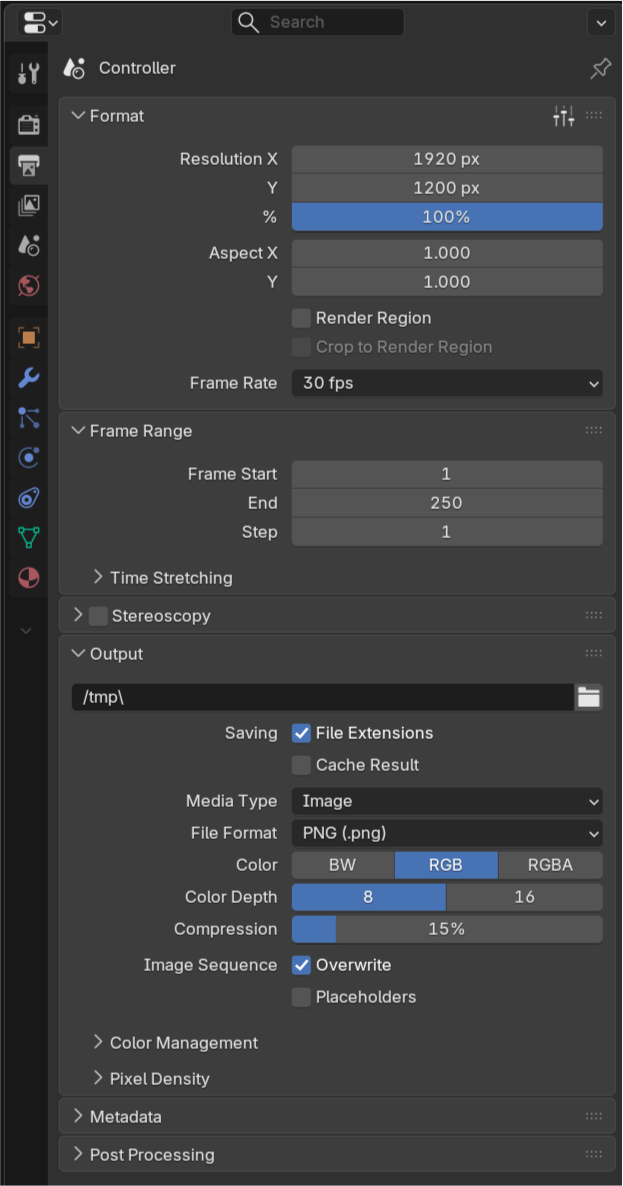
Output Properties — printer icon. -
5Last check before Rendering Tasks
Back in CMS, click Save Config once more so Scene Info and the camera list stay in sync for the next chapter.