Material Variants
A View Component only lists which materials that part can use. Material Variants lock several View Components into one style. Three parts with 3 materials each make 27 images if every mix is allowed. If you only need a wood set and a painted set, that count drops to 2. Rendering Tasks only output those looks.
-
1Decide which View Components switch together
Think in product looks, not in materials. If the body and top buttons share one color set, put them in the same Combination group. If the buttons change color on their own, leave them out of that group.
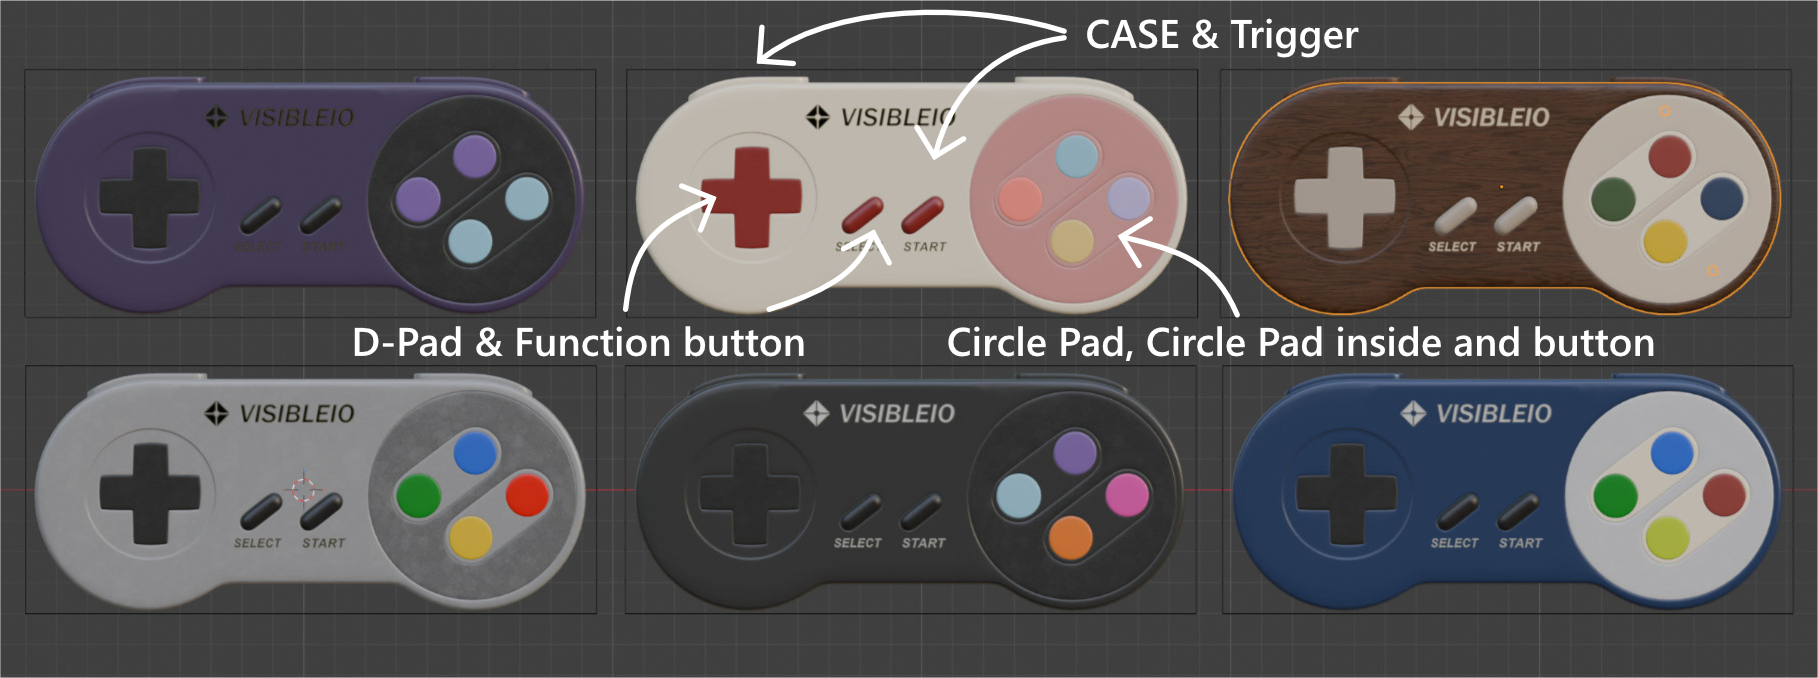
These gamepad parts are split into three Combination groups: Case with Trigger Button; D-Pad with function button; Circle Pad with Circle Pad inside and button. -
2Open Material Variants
In Product Configurator, open the Material Variants tab, then click the Material Variants button at the bottom.
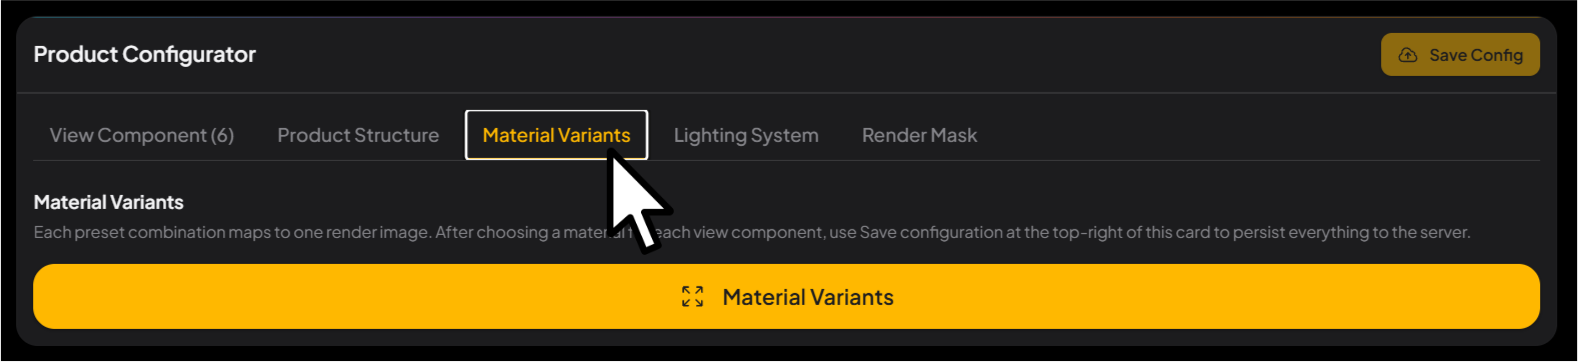
Switch to the Material Variants tab, then click the yellow button below to open the editor. -
3Create Combination groups
- Type a group name (for example
Case & Trigger), then click Create group. - Under Group components, check the parts that switch together — Case and Trigger Button in the screenshot. Unchecked parts stay free of this group.
- Click Add style, then pick a material for each part from the dropdowns. Need six looks? Add six styles. Each row needs a material on every part.
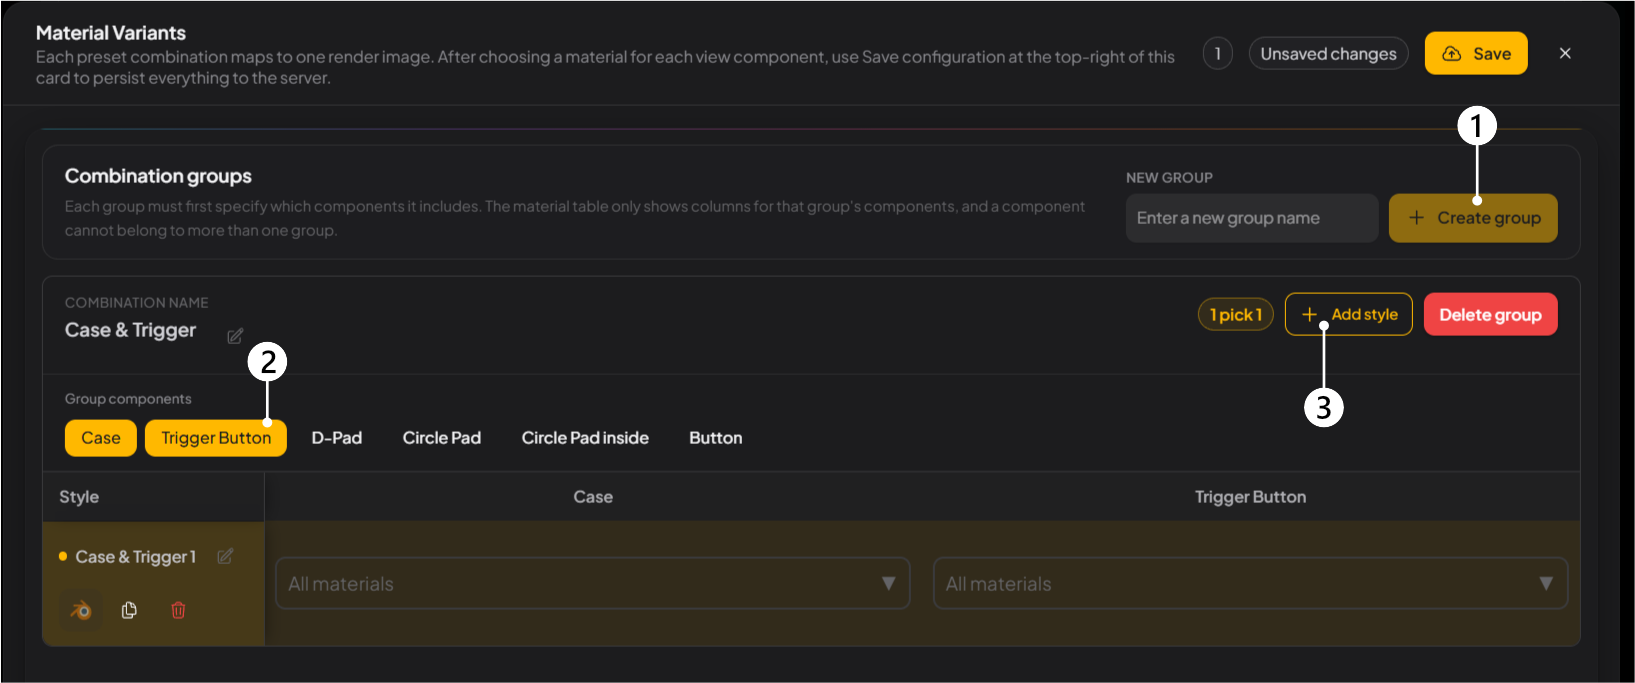
① Create Combination groups; ② check Group components; ③ click Add style and assign a material to each part. - Type a group name (for example
-
4Define styles and materials
Click Add style, then assign a material to each part so the row is a complete look. The style name —
Midnight Violet, for example — is what Viewer shows.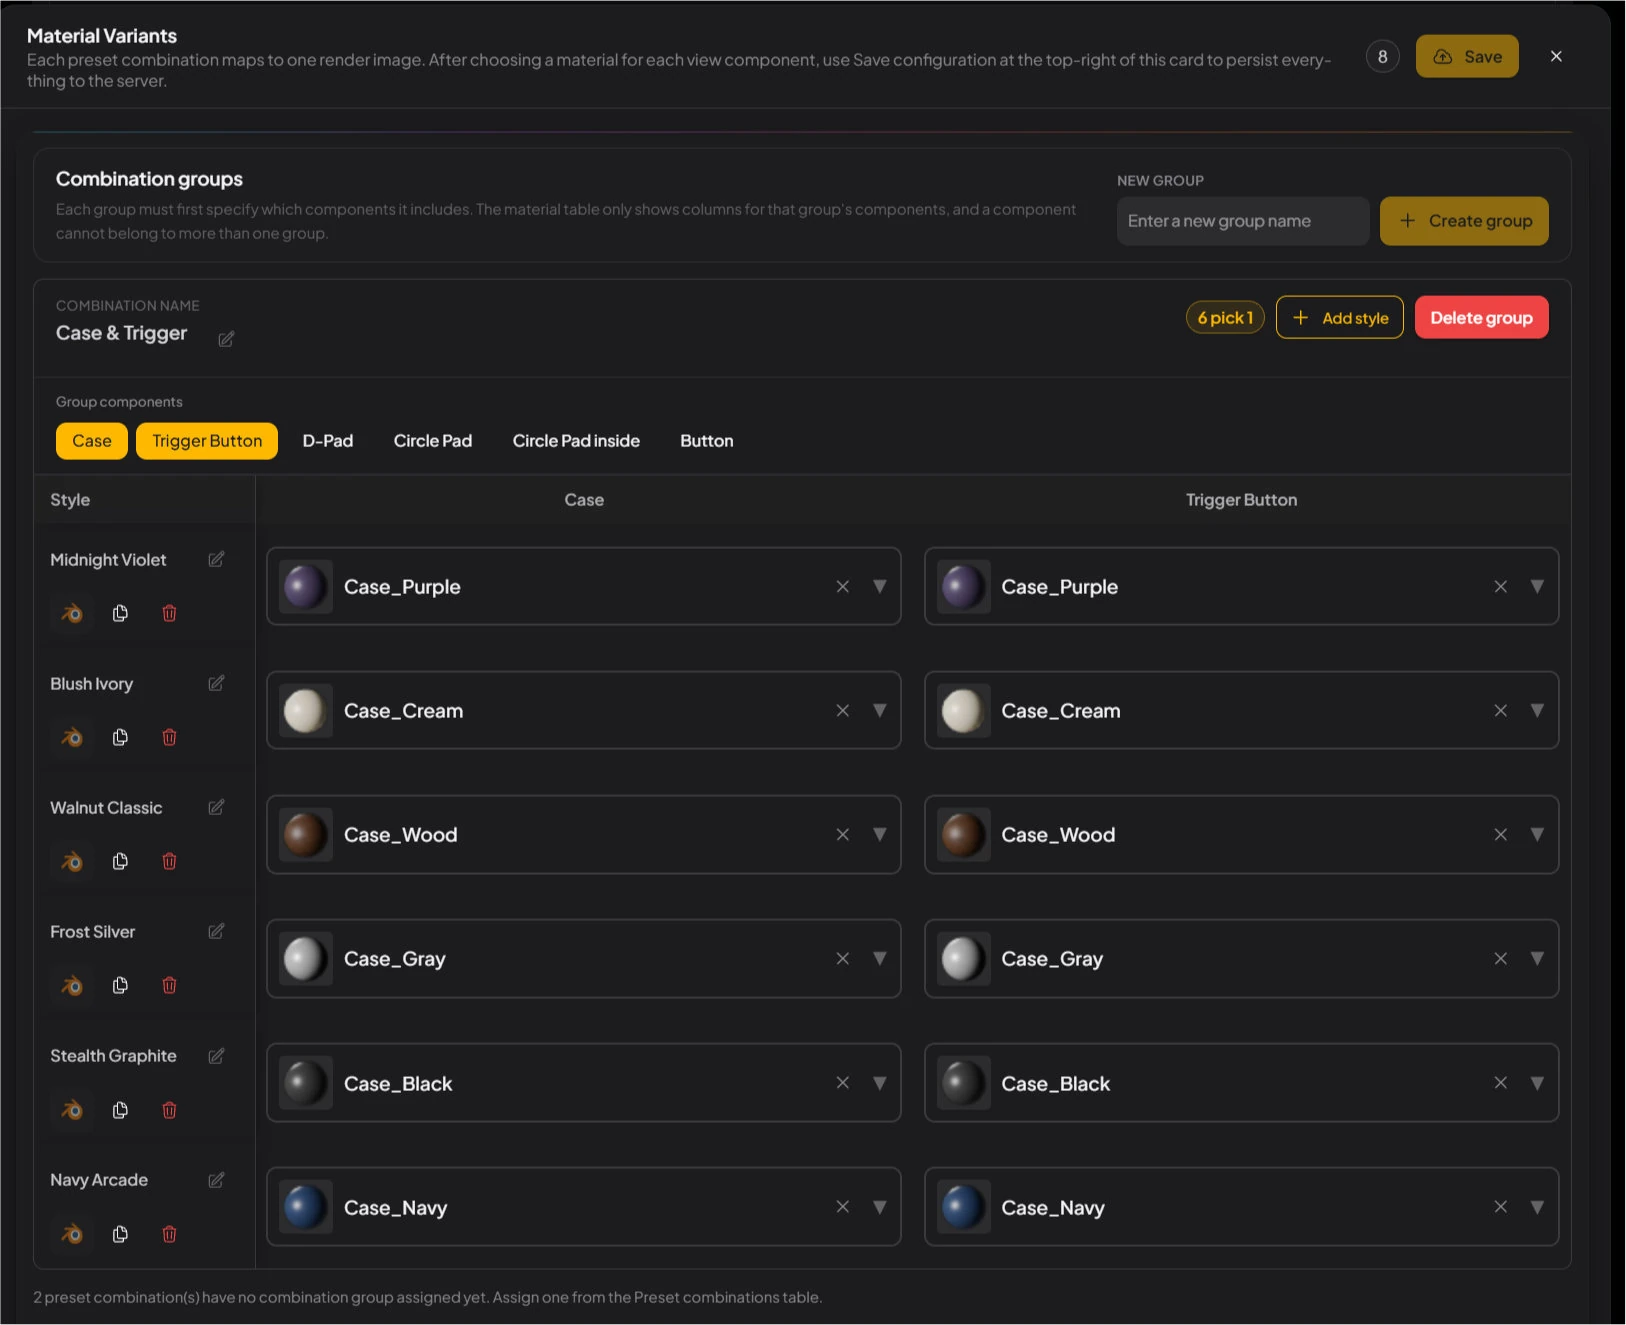
Six Case styles: each row is one complete look. When it looks right, click Save Config. -
5Preview, then save
Click the Blender icon next to a style row to preview that look in Blender. When it looks right, click Save Config. Finish one group, then repeat for the rest. Styles reach Rendering Tasks only after you save.