
Multi-slot materials
Pick one Primary slot for the customer’s switch, then pair each look with a child material on a sub-slot. This page uses wheels: four rims, same rim set, logo on Slot 2.
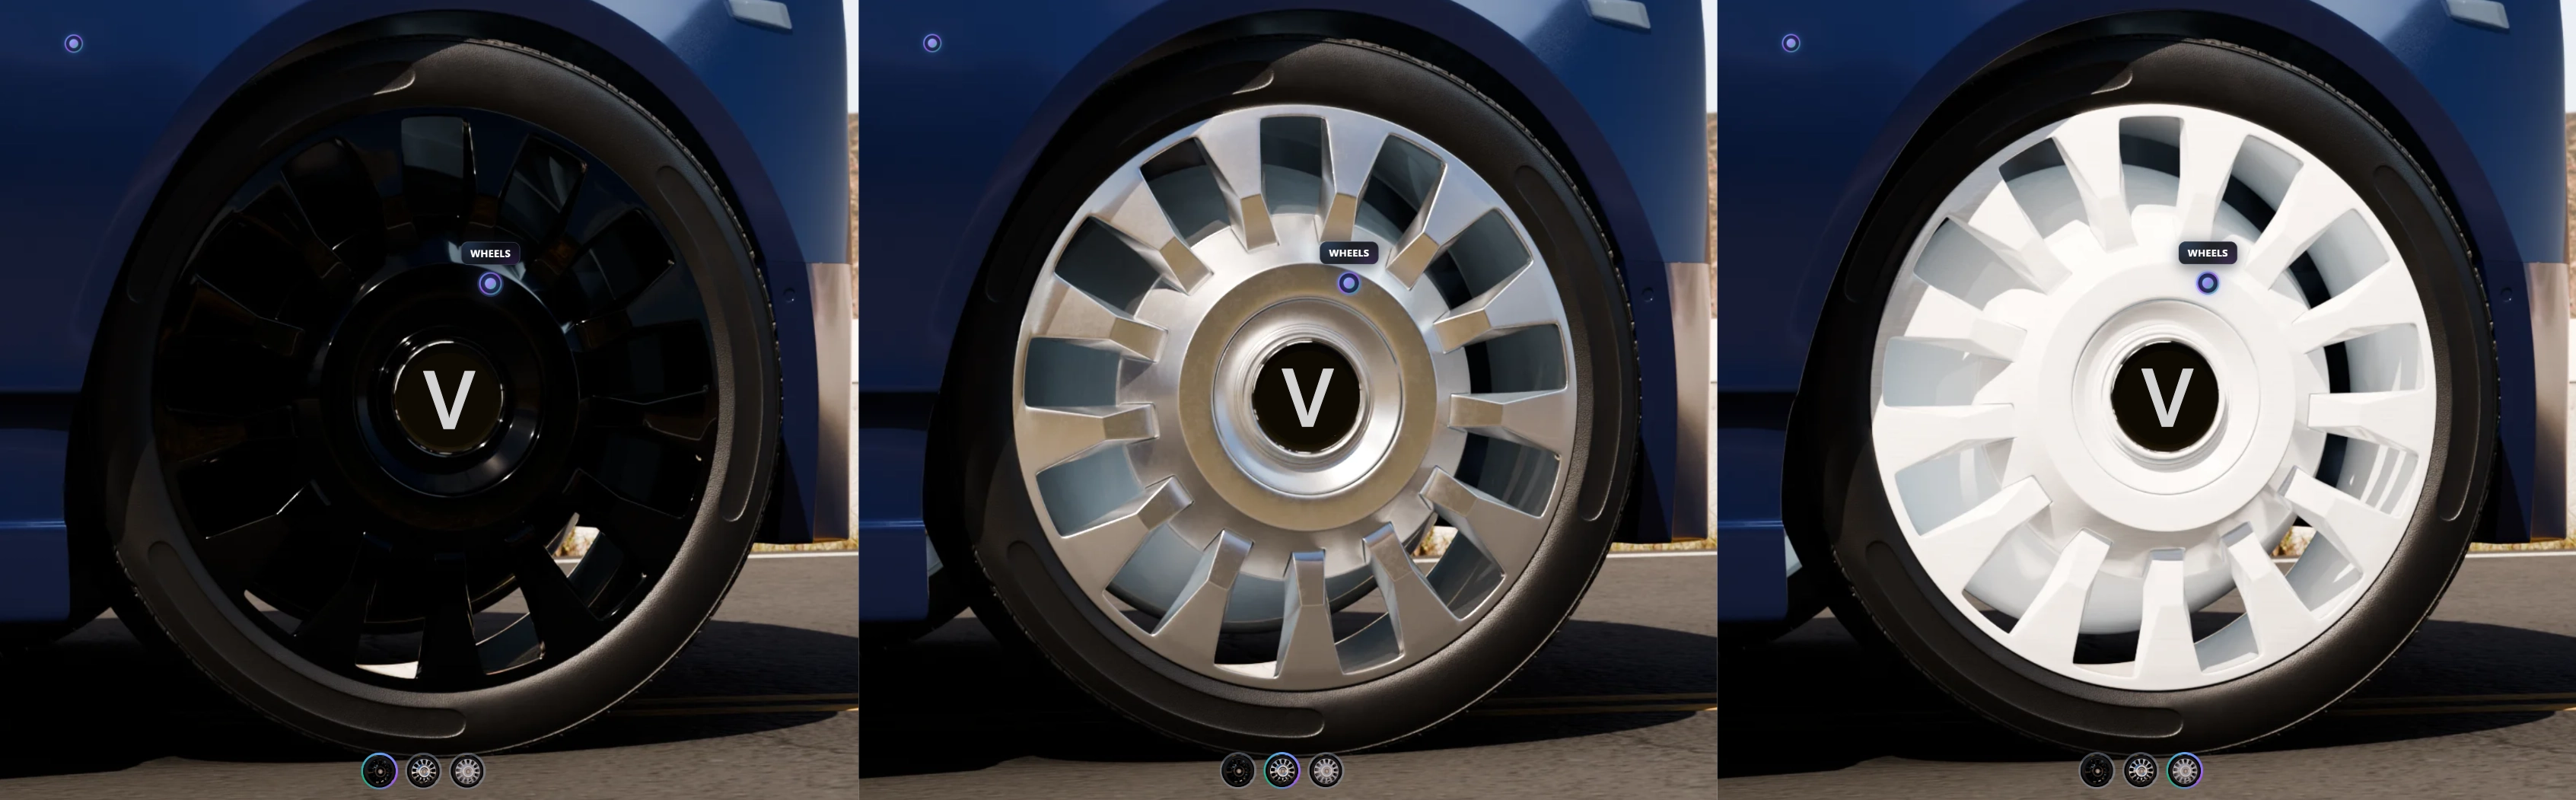
-
1Put matching objects in Select objects
In CMS, open View Component and select the one you are editing. Add every object that should change together to Select objects. This page uses
Wheels— front and rear rims. Assign Materials on the right shows the Primary slot materials. Anything not on that list will not change. -
2Set the Primary slot
Each object has a Material Slot dropdown and a gear. The dropdown is the Primary slot — the look the customer changes. Sub-slots are set on the gear, not here. In the screenshot all four rims use Slot 1. The three materials on the right are that slot’s options.
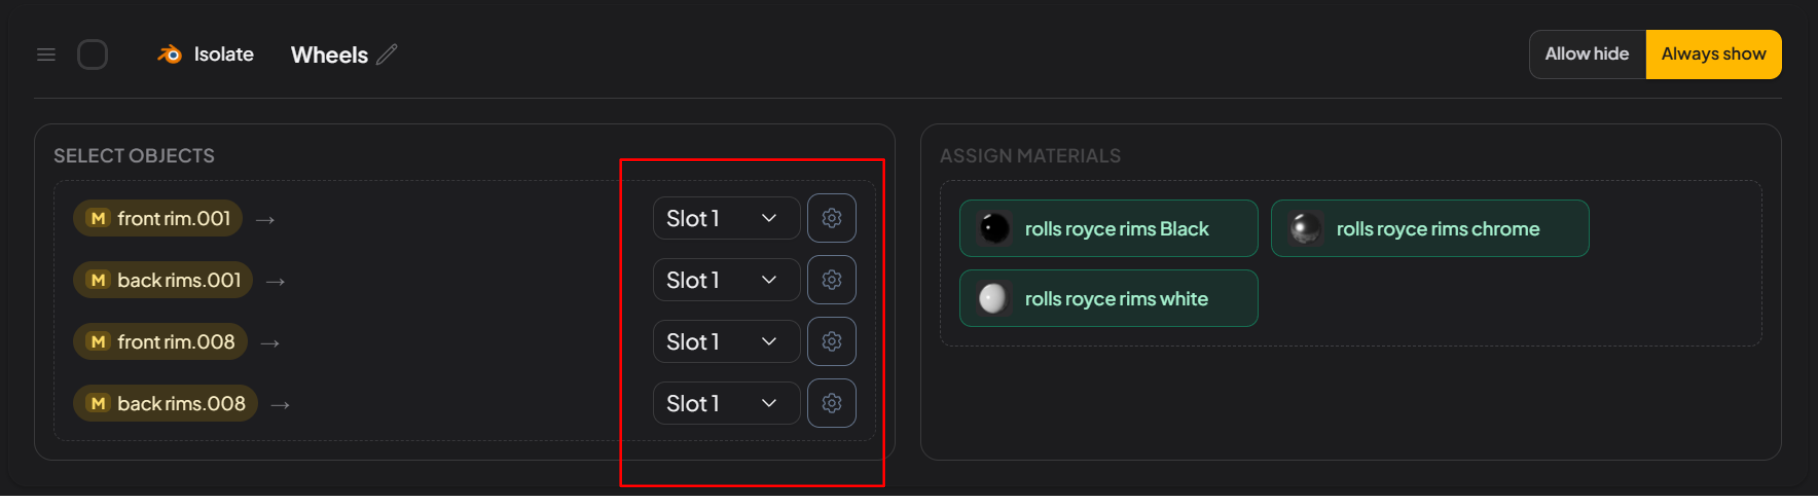
The dropdown sets the Primary slot. The gear opens sub-slots. Assign Materials on the right shows the Primary slot materials. -
3Define pairings in sub-slots
Click the gear to open Configure material slots. Each row is one primary look. On the right, pick the child material that goes with it. The screenshot pairs Style 1–3 with Slot 2.
Click Confirm config, then back on the main page click Save Config. Repeat for the other rims. The pairings are stored after both clicks.
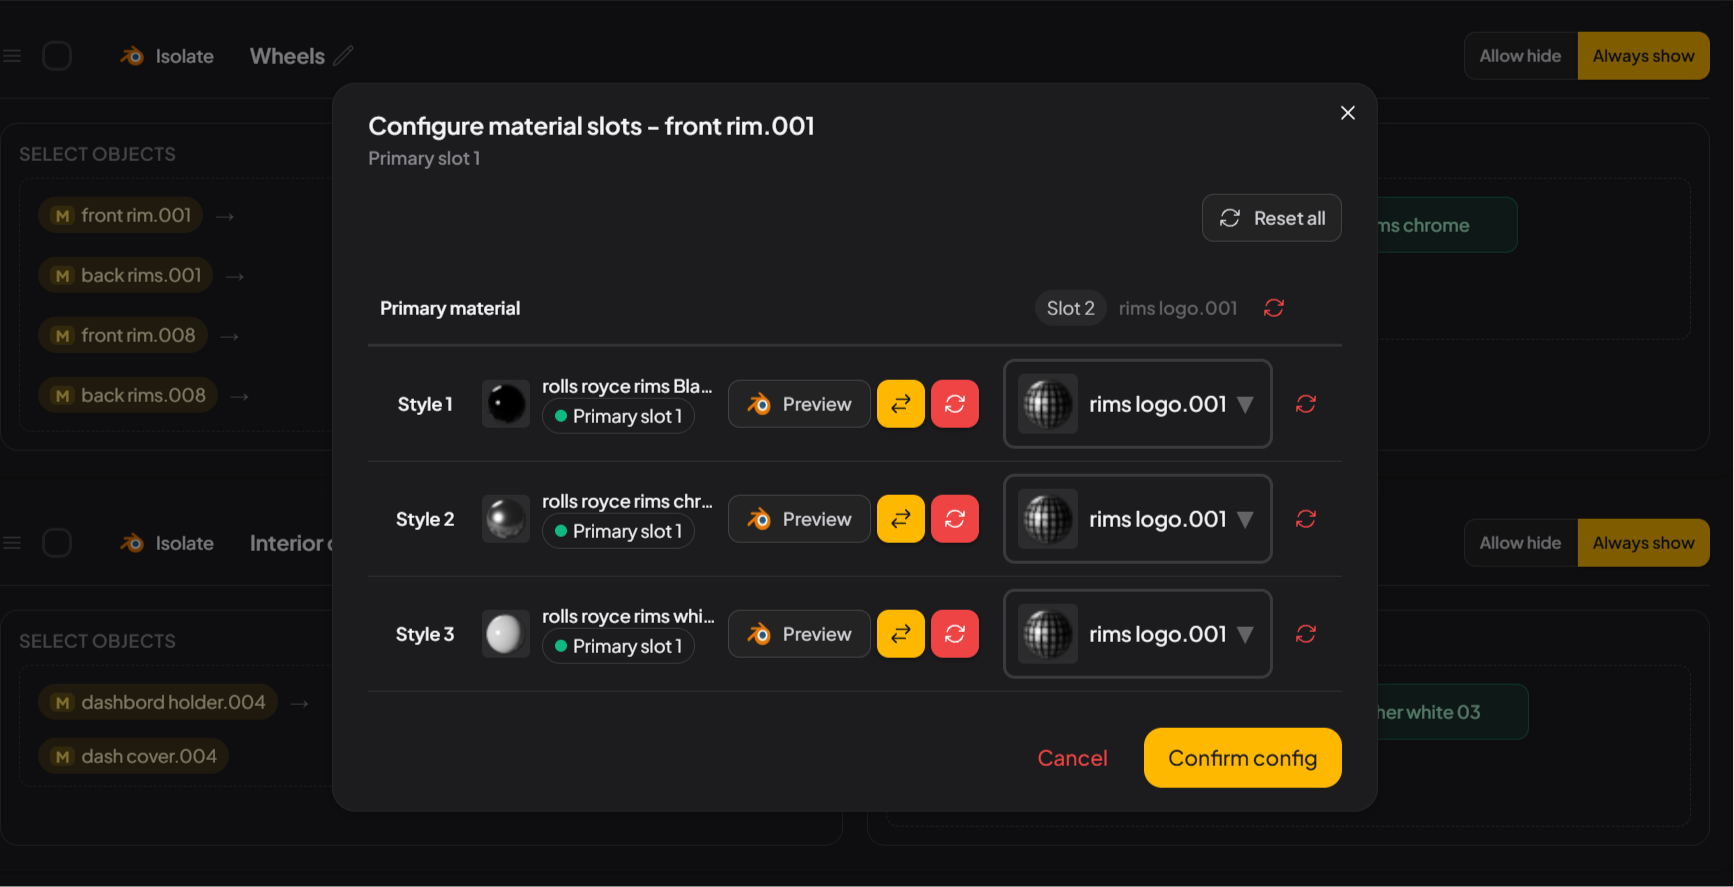
Each Style row picks the child material for Slot 2 ( rims logo.001here). When it looks right, click Confirm config.Blender icon Preview the style in Blender. Yellow opposite arrows Copy the Primary slot material onto the other sub-slots. Red cycle arrow Reset that row. Reset all Reset every row.