
Prepare the scene and View Components
This chapter gets the Blender scene and materials ready, then in CMS makes View Components. Objects that switch the same materials belong in one View Component.
-
1Lay out the scene in Blender
Use Collections and clear object names. Split the product into objects that can swap materials. Keep objects that never change material out of those Collections — Scene tree is easier to pick from that way.
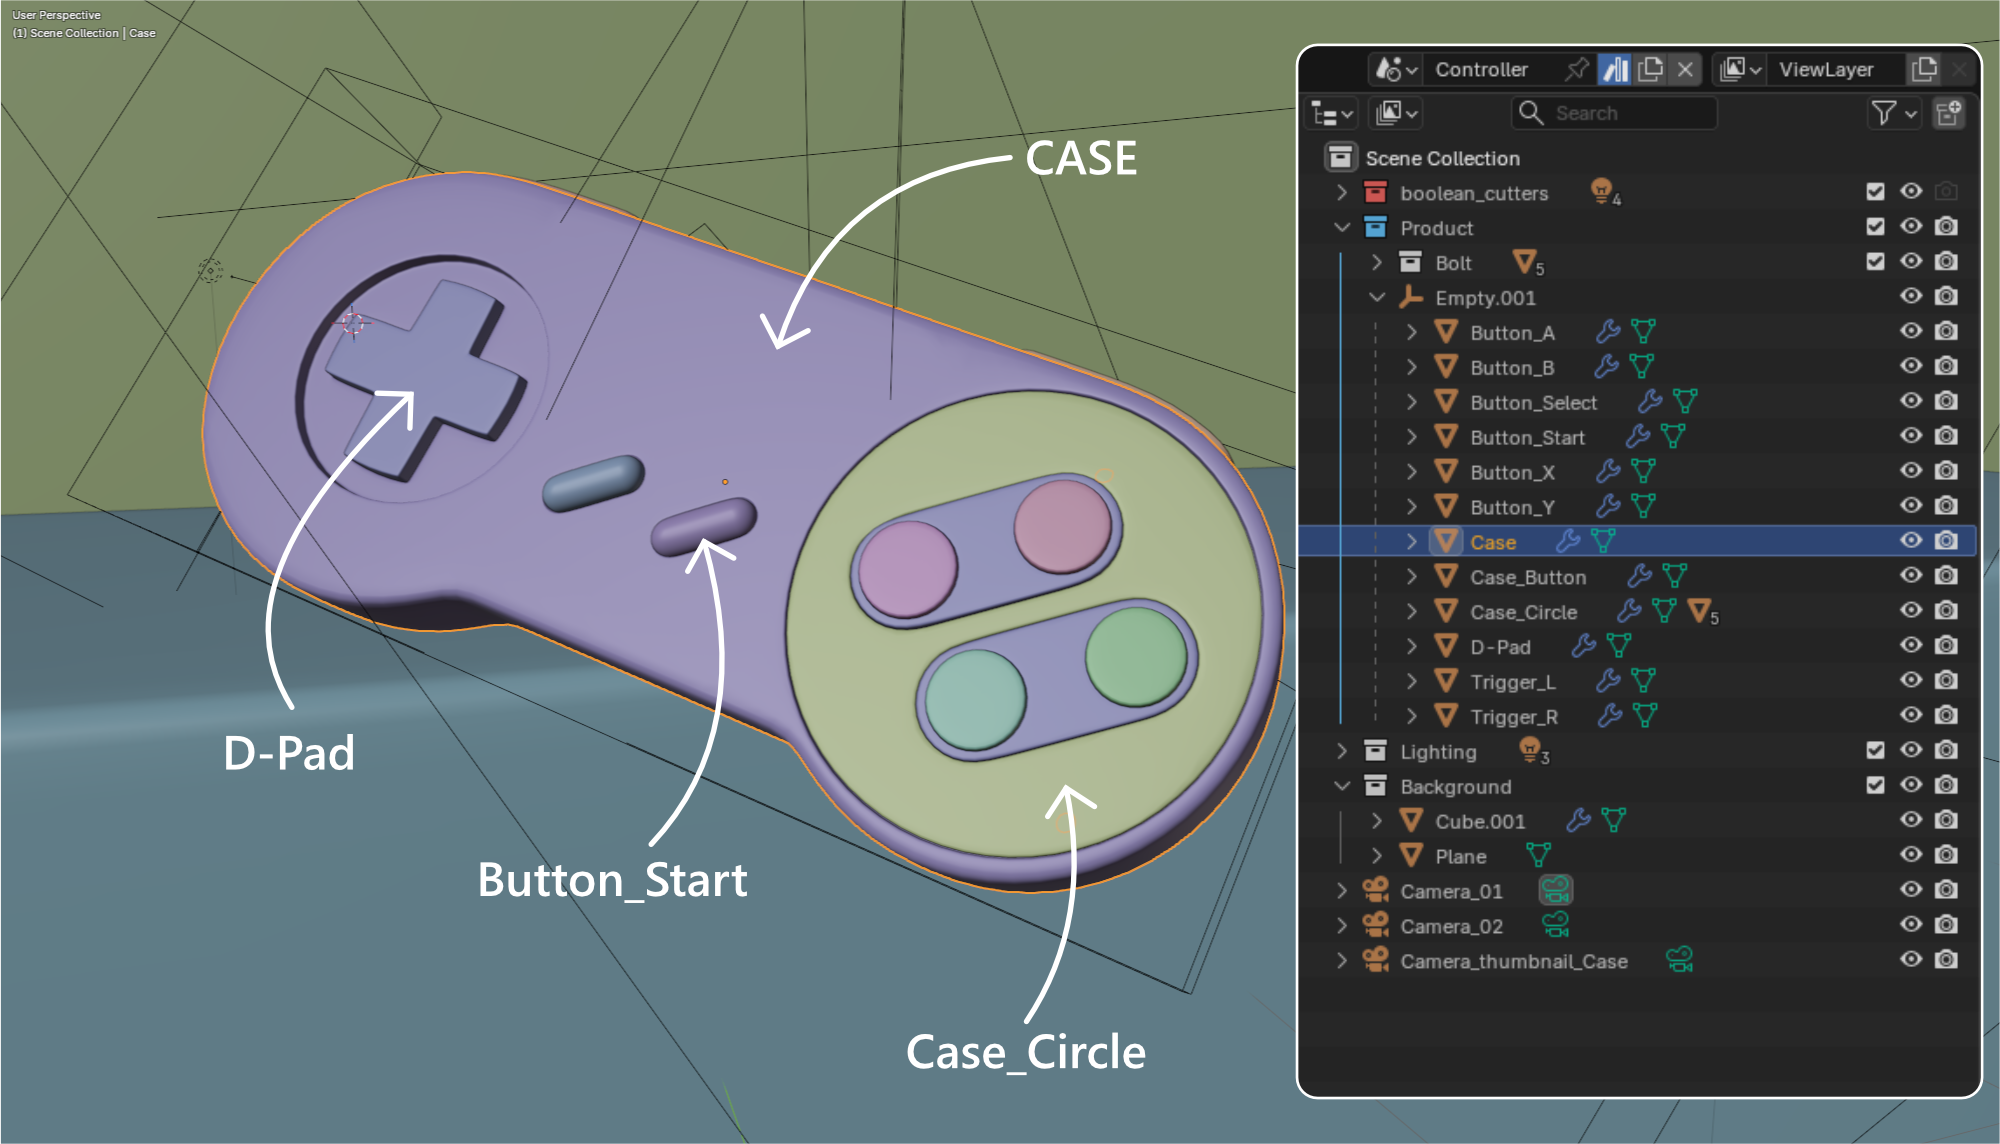
-
2Prepare materials
In the same
.blend, add a dedicated Scene for the different looks: top bar, Scene dropdown, then New. That keeps the looks easy to manage and compare. Name materials after the object — Case usesCase_Wood,Case_Paint_Purple,Case_Paint_Red. A generic Shader name is easy to mix up later.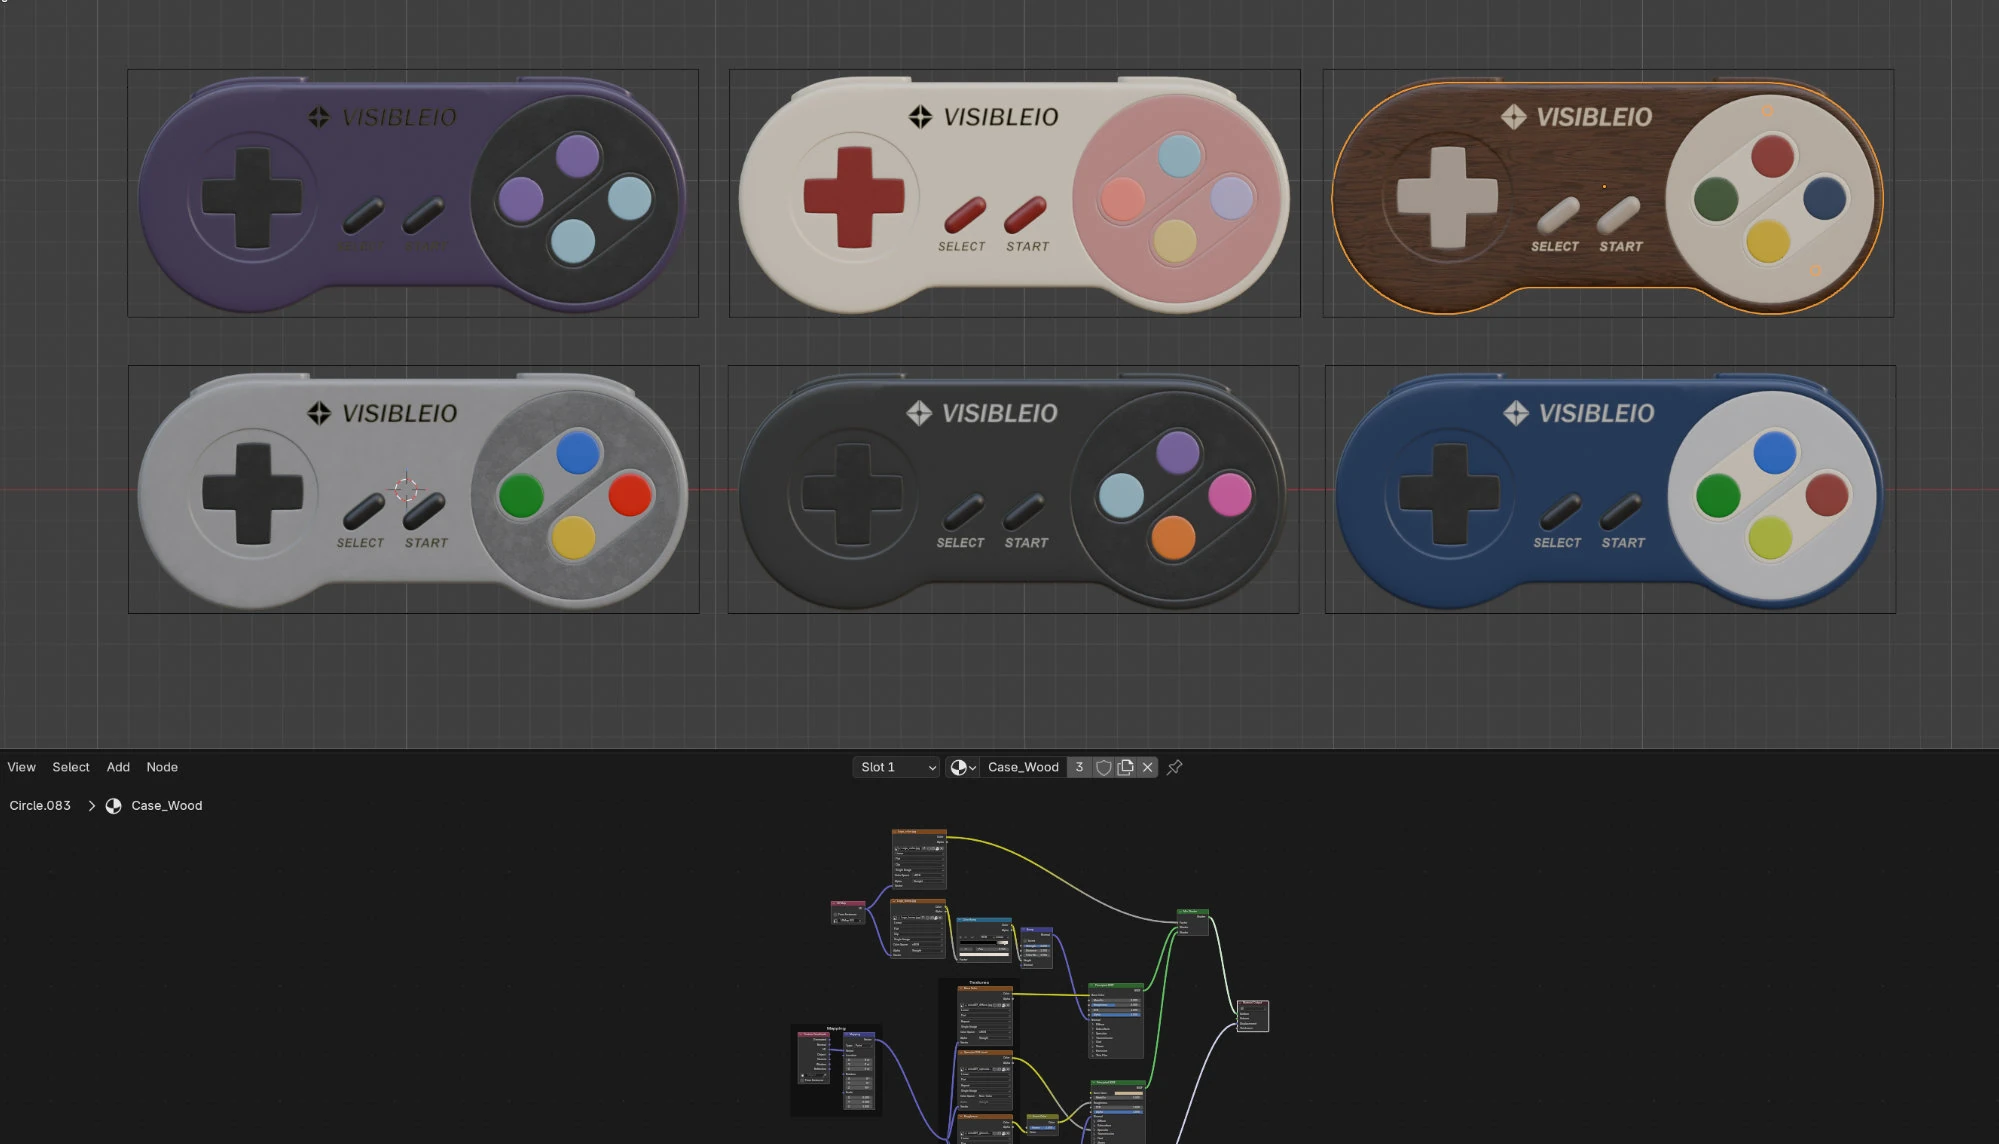
-
3Sync, then check CMS
Switch back to the Scene you will sync. Confirm Connected, then click Refresh. The material list should show the materials you just prepared. If anything is missing, check the connection and click Refresh again.
-
4Set Scene Info
In Scene Info, check the objects that will change. You can check a whole Collection or select all. Extra checks are fine. A huge selection is just harder to pick from later.
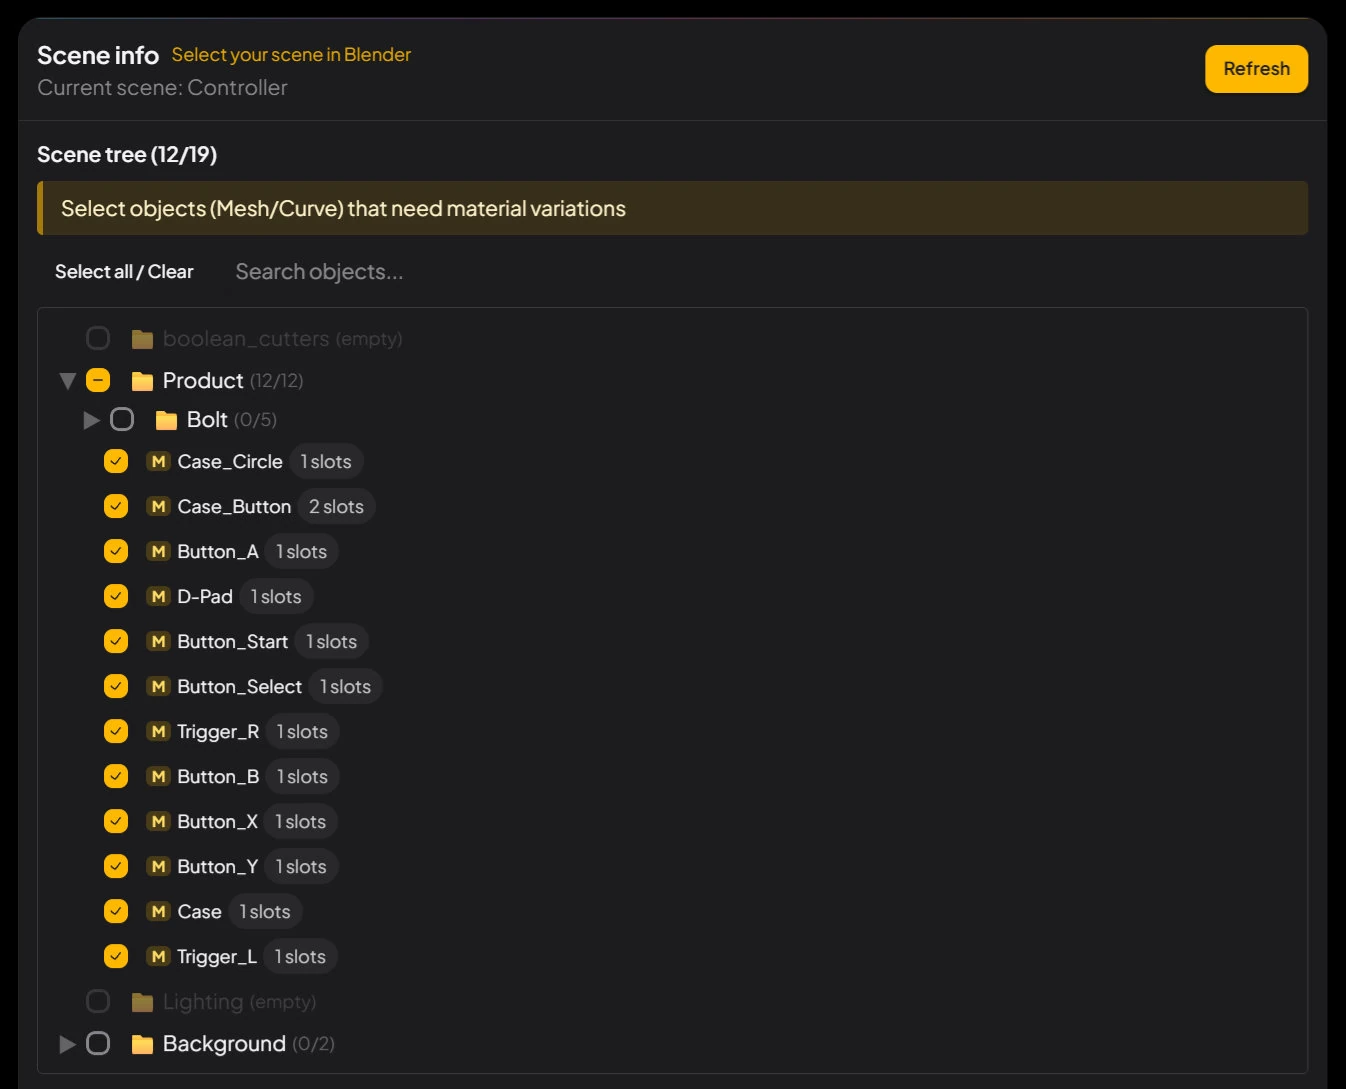
-
5Create a View Component
Click Create View Component, name it, and check the matching objects. Same material switch → same View Component.
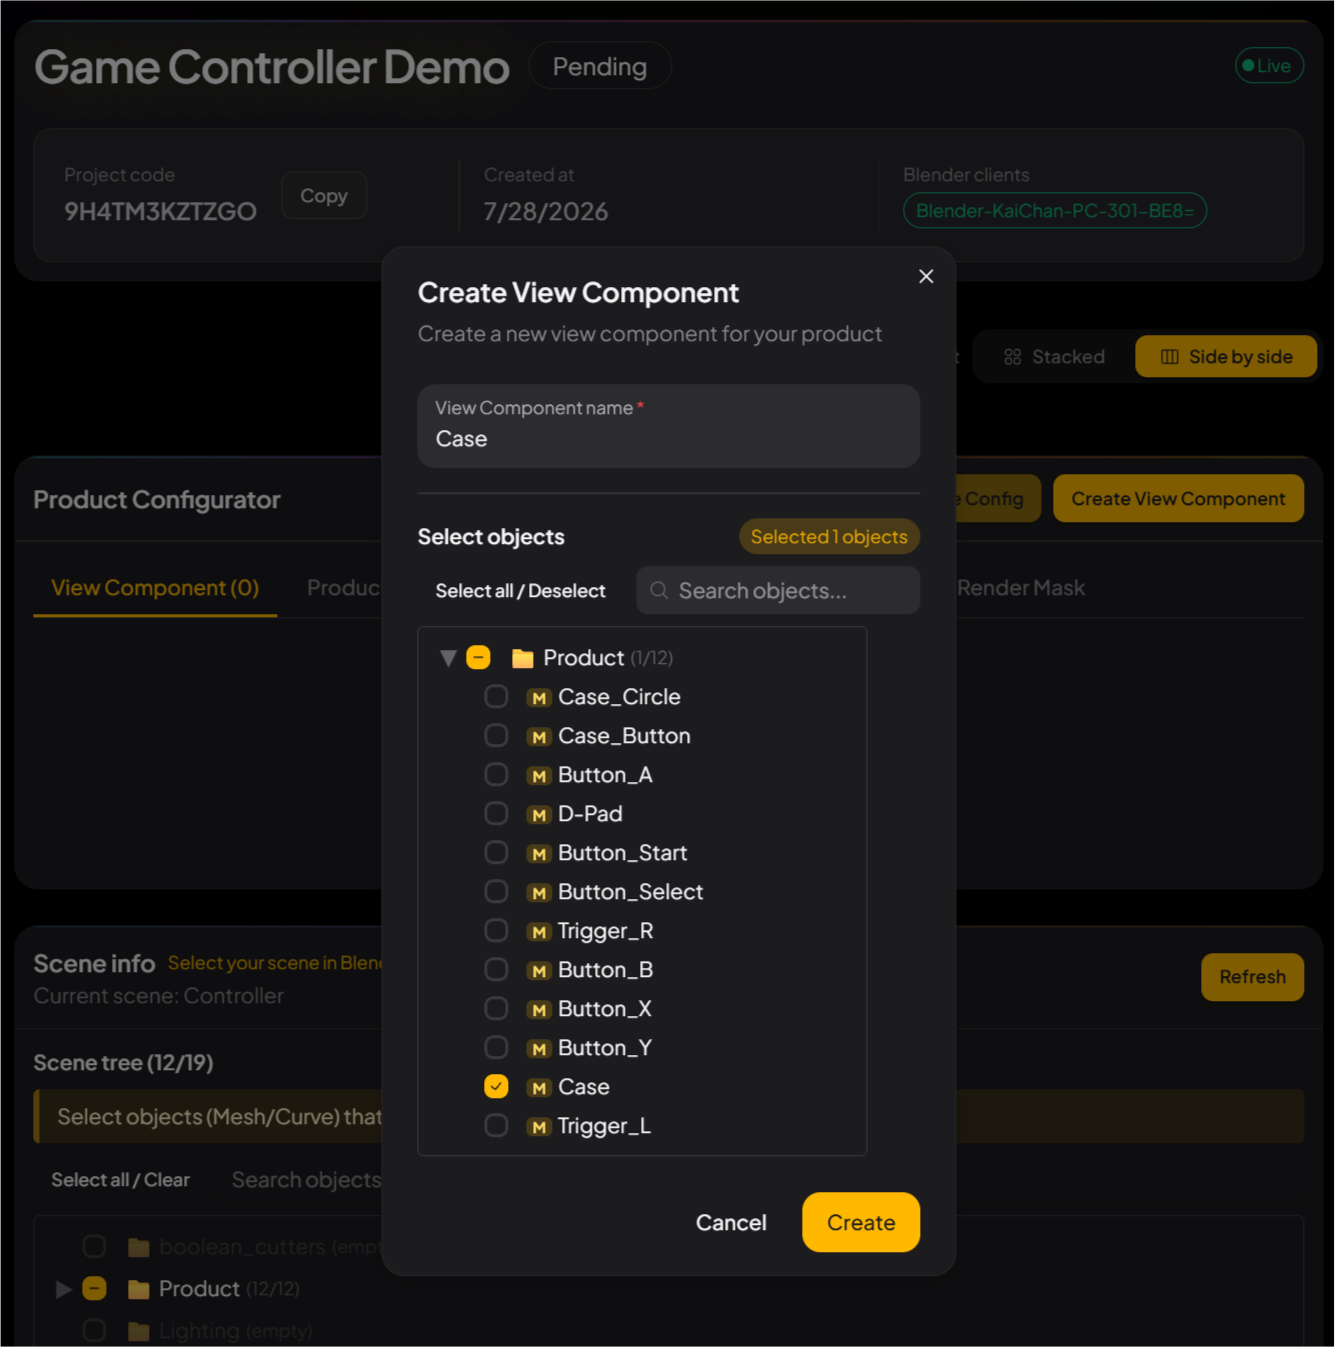
-
6Assign materials to the View Component
Under the View Component, click Assign Materials. Check the materials this part can use. Then click Save Config. The assignment is stored only after you save.