Create a project and connect Blender
Connect this .blend to one CMS project. Paste the Blender Token, then the Project code. Once per project. The later chapters need the Add-on to show Connected.
-
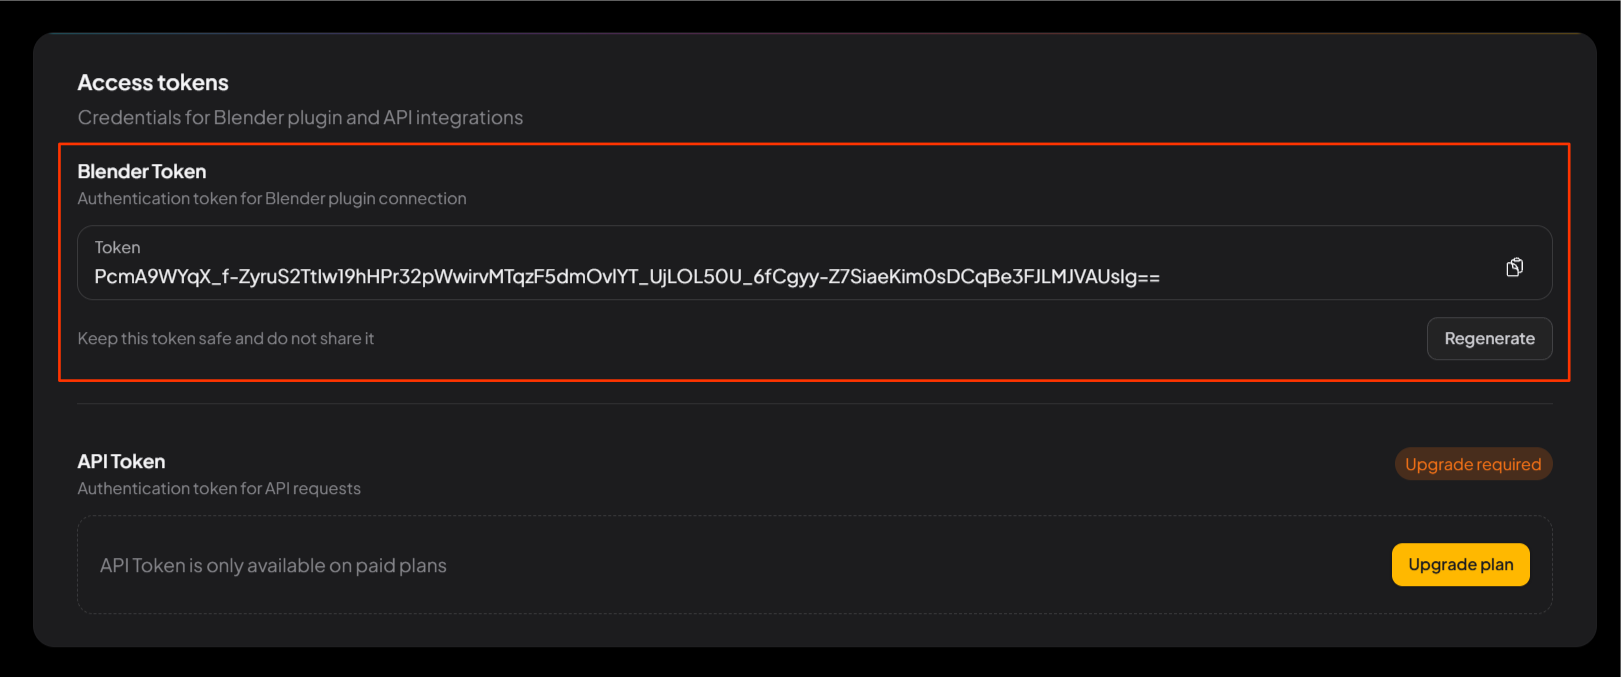
1Copy the Blender Token
In CMS, open Access tokens. Click Copy on the Blender Token. This is the key for this user, not for one file.
-
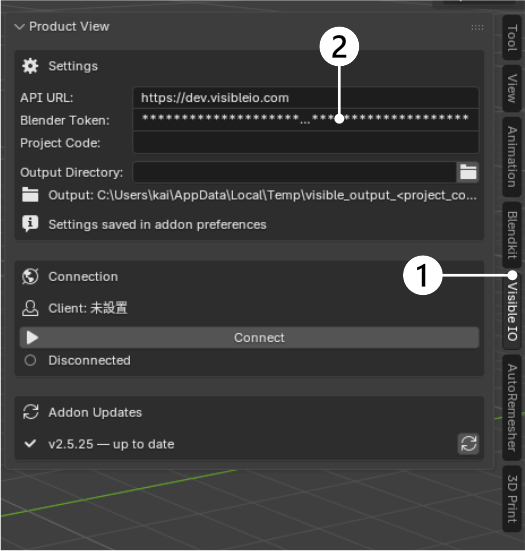
2Paste the Token in Blender
Press N to open the VisibleIO panel. Paste into the Blender Token field. If this field is empty, Connect will fail later.
-
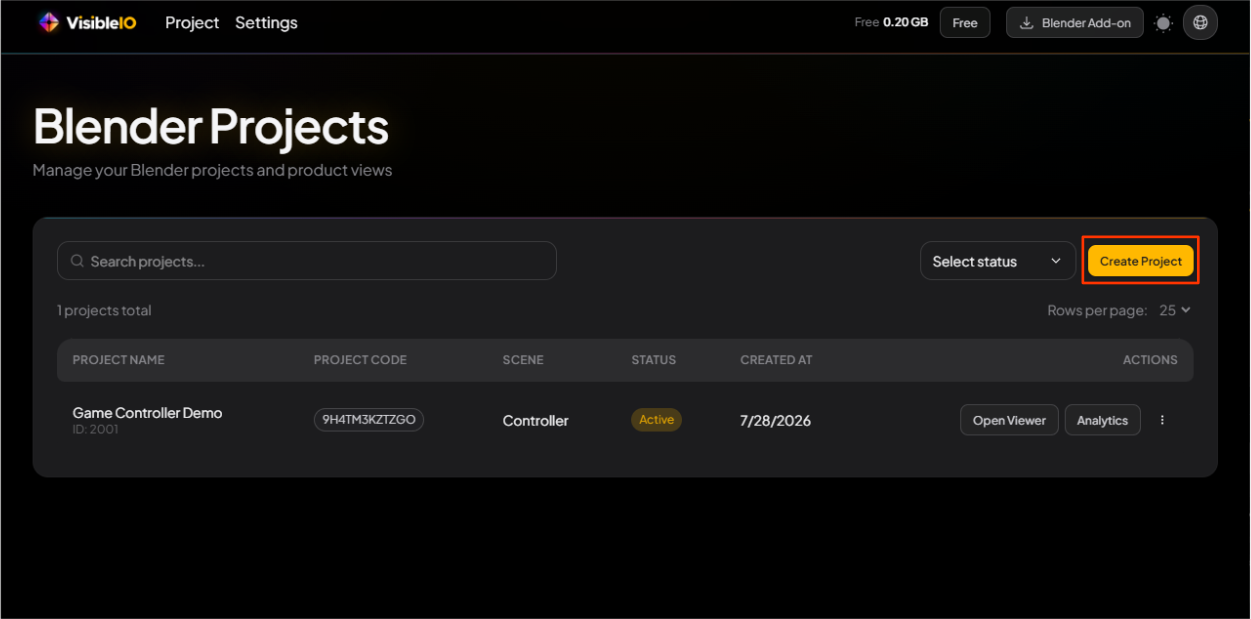
3Create a project
In CMS click Create Project and name it. Everything after this — scene, materials, Rendering Tasks — sits under that name.
-
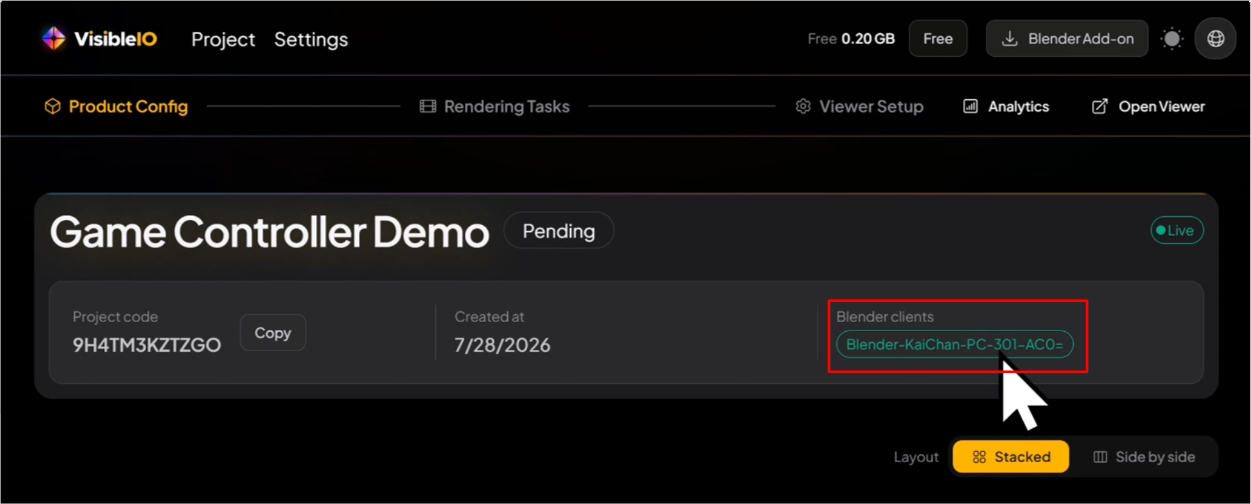
4Copy and paste the Project code
Open the project. Click Copy on the Project code. Paste it in the VisibleIO panel, then click Connect. Token without a project code does nothing.
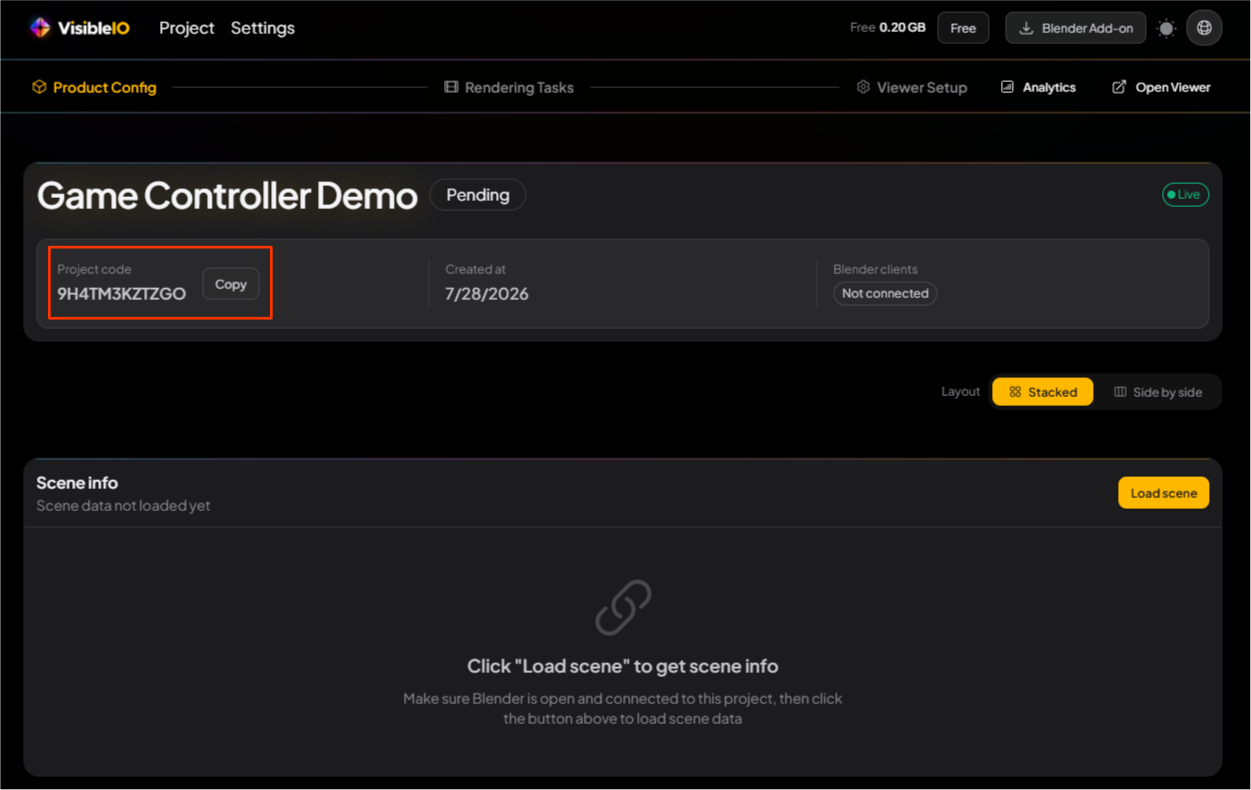
-
5Confirm Connected
Look for Connected on the Add-on. On the project page, Blender clients should list this machine. If either is missing, paste again and wait for Connected.